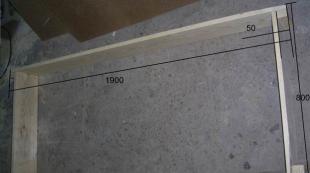
How to make a shoe rack (shoe rack) with your own hands
Shelves from furniture stores do not always fit into the required size. Therefore, today we will try to make some original shoe shelves with our own hands.
The simplest shoe rack from old furniture
First you need to cut the boards into blanks. Standard height between shelves - 23 cm. width should be such that both women's and men's shoes fit in it - it should be 30-35 cm. Depending on the number of family members, the size of the shoe and its height may be different. The shelves in it are installed at different heights: for children's and adult shoes, shoes, boots and sandals, a large shelf for boots.Let's say we need to make a shoe rack measuring 100x35x46 cm. For it, we need three side walls measuring 35x45 cm, a top board 100x35 cm and three shelves 47x46 cm.
Shelf 100x35x46 cm
If the surface is too worn, you should first clean the varnish from the boards with sandpaper or a grinder with a special nozzle. Since this produces too much dust, it is better to work on the balcony. Damaged places are puttied.
Boards are fastened together furniture corners using small self-tapping screws 12 mm long. A thin sheet of HDPE is attached to the back of the shelf, with which cabinet furniture is lined.

Shelf fixing
Advice. So that the shelf can be moved close to the wall, at the junction with the baseboards, the lower part of the side walls must be cut at an angle of 45 °.
Shelf made of wood or wooden slats
The principle of making wooden shoes is similar to the previous one. The only difference is in the attachment. To securely fasten the boards together, they are drilled in the side walls holes for inserting screws. The same holes are prepared on the crossbars from the end side.The screws are screwed into the board in such a way that their hats are slightly sunk into the wood by a couple of millimeters. The holes are leveled with sandpaper and puttied. You can also hide the holes with the help of plastic plugs - they are sold in any furniture store.
To strengthen the product on its rear ends are additionally attached metal corners. Before starting work, small irregularities are cleaned with a grinder, grinder or emery.

Joining bars

Shoe box made of wood
You can darken the tree with a water-soluble or alcohol stains- a dye that gives the tree a certain color. You can replace it with a normal potassium permanganate- it perfectly paints over wooden surfaces. In order for the coating to turn out even, the tree must be slightly moistened before painting. After painting, the product is treated with varnish and dried thoroughly.

Stain processing

Another option for a wooden shoe rack
Advice. The shoe rack can be turned into an original ottoman if you upholster its upper part with foam rubber and cover it with a fabric of a suitable color.

Ottoman-shelf for shoes
original round shelf
1. To make a rounded shoe with a jigsaw, you need to cut round blanks. Their diameter should be about 600 cm. You can replace the compass with a nail hammered into the center with a pencil attached to it on a cord. After cutting, the edges are carefully polished with sandpaper or a grinder.2. Now let's start manufacturing rungs. They will need 8 pieces (4 for fastening between the lower and middle blanks and 4 for installation between the middle and upper). The size of each of these parts is 160x200 mm. After cutting, they are also polished.
3. On the underside of the round blanks, mark the places where the partitions are attached. To do this, draw two straight lines with a pencil at an angle of 90 ° to each other. The intersection should fall exactly on the center of the workpiece.
4. On each line, we drill 4 holes for inserting screws. We prepare the same holes at the ends of the crossbars.
5. Now it remains to fasten the parts together and paint the shelf in any color or cover it with stain or varnish.

round shelf
6. Such a shelf can be made angular, if you use only 1/4 of the rounded workpiece.

Corner semicircular shelf
Hanging shoe rack
To save space in the hallway, shoe racks can be made hinged. Attaching them to the wall is easy. To do this, you need a puncher or drill, anchors (L-shaped hooks), dowels, a screwdriver and the shelves themselves:
Metal suspension (anchor)
In order for the shelves to be located strictly horizontally, we mark the wall using the building level; on the resulting line we place the attachment points;
We drill the required holes in the wall;
We prepare the same holes in the shelf itself;
We insert dowels into them and fasten the boards to the wall.
Advice. It is better to drill at a slight angle to the ceiling. In this case, the fastening will be more reliable, and the shelves will fit closer to the wall.

You can also fix the shelves on the wall using metal profiles.
Shoe rack made of metal pipes and PVC pipes
An original design shelf made of metal and wood can be made in a matter of minutes. For this you will need:Wooden, stained or painted boards;
Metal pipes;
Angular adapters;
Couplings (when using pipe cuts of insufficient length);
Plastic plugs for legs;
Rust neutralizer.

Flanges for metal pipes
First, the metal must be treated against rust with neutralizer(special liquid). Next, the pipes are cut into segments, and the metal structure is assembled using corner adapters. Pipes are attached to the shelves with flanges. To prevent the metal from rusting in the future, the finished structure can be painted or treated with a transparent or colored varnish.

Shelf made of metal pipes and wooden planks
Such a shelf can also be made from plumbing pvc pipes. To do this, they are cut into segments of the required length, through holes are drilled in them for attaching shelves, and corners, tees or plugs (fitting connections) are put on the ends. It remains to cut the boards or fiberboard of the required size and install them on the shelves.
Video: Do-it-yourself shoe rack (shoe rack)


