Do-it-yourself methods for installing a wooden picket fence
Just 50 years ago, wooden picket fences could be seen around most country houses. But, these were the same type of vertical structures. Now a reliable and durable picket fence can be erected in various configurations and even in combination with other materials. It is quite easy to erect fences with the correct calculation and preparation of the material. It will serve as a reliable protection of the site, and decorate it with its appearance.
Advantages
Everyone wants to make their home beautiful, and the fence is the element of the suburban area that is paid attention to in the first place. Therefore, it is important to give this element maximum aesthetics. One of the materials that fall into the category of aesthetic and malleable for unique buildings can be considered wood. If you have the skills to work with wood and the desire to independently build a fence around the site, then the question of how to make a fence from a picket fence will be solved by itself.
A do-it-yourself picket fence, with applied imagination and a little skill, will look great on any terrain and against the background of any building.
The reliability of a wooden fence depends on the selected type of wood for its manufacture, as well as on the size of one picket fence. If you make the right choice, the fence will last for many years.
Taking proper care of it is not difficult at all. All the owner has to do is apply protective substances to the surface in a timely manner. It is also important that the picket fence almost does not shade the area and has excellent air throughput. Any plants that need sunlight can be planted near it.
Basic types of styling

Vertically and horizontally
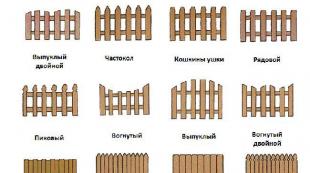
Traditionally, in the manufacture of a wooden fence, the pickets are installed vertically. But horizontal installation is also possible. This design is made from several planks or poles. In another way, this type of fencing is called "ranch". It works well for creating a rustic look.
You can even tilt the slats to one side, and then you get an even more unusual fence. And given that the angle of inclination can be different, there are countless options for creating unusual designs.
Staggered
The chess fence also has an attractive appearance. It looks beautiful not only from the outside, but also from the inside. The peculiarity of the arrangement of wooden parts is that the pickets are installed on both sides, but are displaced in relation to each other. The gap, on the one hand, is closed by the rail on the other, and vice versa.
Preparation and calculation of material

A wooden picket fence is so easy to install that you don't even need a lot of tools to install it.
To make the picket fence itself, in addition to wood, you will need:
- fasteners - nails or screws;
- hand saw or jigsaw;
- screwdriver;
- protective substance for application to the surface. These products include water-repellent and antiseptic impregnations, as well as varnish, stain and paint;
- a shovel for digging a hole under the support pillars;
- hammer, if nails were selected as fasteners;
- building level, so that all elements of the fence are set evenly.
You can buy wood and make a picket fence yourself, or you can buy a picket fence ready-made. In the latter case, you will have to pay more, but there will be less work.
Note! Before making a picket fence, it is important to perform the correct calculation of the wood material. Based on the perimeter of the territory, as well as the width of the shtakentin and the gaps between them, the required number of wooden elements is calculated. For example, if the width of one picket fence is 4 cm, and the width of the gap is 6 cm, and at the same time it is planned to make a fence 30 m long, then to calculate the amount, 30 m must be divided by 10 cm, that is, by the total width of one gap and one shtakentina.
How much picket fence is needed depends on the chosen design. For example, if a fence is to be erected with gaps, then less material will be needed for it than for a blind structure of the same length.
It is important not to forget to calculate everything in the same unit of measurement. It is easier to express meters in centimeters, and then 3000 will need to be divided by 10. After the calculation, it turns out that such a fence will require 300 pieces of fence. In addition to the material for the manufacture of the picket fence itself, beams for the supports will also be needed. These posts must be long enough and strong enough. It must be remembered that they will submerge at least half a meter.
Stacking the picket fence in a checkerboard pattern

You can install a picket fence by working in the following order:
- Markup. It is necessary to determine where the support pillars will be located. A strong rope stretched around the perimeter can help in this matter. The optimal distance between the supports is 2-3 meters. Considering this, it is necessary to make marks on the ground in those places where holes will be dug.
- Digging grooves. Their diameter should be greater than the diameter of the support pillar. The calculation of the depth of the pit depends on how much the height of the future fence will be. Most often, it exceeds 1 meter.
- Installation of pillars in prepared grooves. If they are wooden, you can simply get by with the application of protective agents to the surface. It is possible to lay a wooden picket fence and, using metal pillars, in this case, you will have to lay a concrete mixture in the recess.
- After the supports are installed, you can begin to attach veins or slugs to them - thicker boards that should be located parallel to the ground surface, that is, perpendicular to the support posts. At least two veins are required. Their number depends on the total height of the building.
- The calculation of the distance between them can also vary. It depends both on the height of the mounted fence and on the method of fastening the pickets to them. The main thing is not to bring the lower sledge closer to the ground by less than 25 cm, and the upper one should not be raised too high so that the edges of the hammered pickets rise above it by at least 25 cm.
- When the installation of the veins is complete, you can start attaching the picket fence itself. When installing the very first picket fence, it is better to use a building level so that the entire fence does not turn out to be crooked. If there is no level, you can use a plumb line instead, which is easy to make yourself using a heavy weight and thread. To attach all the other pickets, it will be enough just to determine the width of the gap. You can make it equal to the width of the pickets and easily measure the required distance by applying one of the rails. But you can specially make a rail of the required width, so that it can then be used only to make gaps.
- When slats are nailed along the entire length of the fence, you can be content with the work already done, since, in essence, the classic fence is already ready.
To make a "checkerboard", you will need to go to the other side to install another row of pickets. In order to avoid distortions and inaccuracies, it is necessary to correctly install the first rail. It should be located strictly opposite the gap between two adjacent pickets on the other side. After installing this rail, it remains only to nail down all the others, measuring the length of the gaps using a template.
Painting secrets

Painting the finished structure
It is not difficult to paint a picket fence with your own hands, but nevertheless, you need to be careful about the details. The durability of not only the paint layer, but also the entire structure depends on the quality of this work. For a high-quality coating, you need to clean the wood from dirt, and then prime it with a substance that can deeply penetrate into the structure.
Multiple coats can be applied. Wait until the previous coat is dry before applying the next one. Many manufacturers can assure that there is no need to prime the surface before painting. But, nevertheless, it is better not to pay attention to this statement, and to carry out a primer. This will have a positive effect on the durability of the wood and on the economy of the main coating.
It is also better to paint in several layers. After applying the first layer, it is better to sand with sandpaper after drying. For painting, it is better to use a brush, not a roller, as it will allow you to get to hard-to-reach places. But if there is a desire to speed up the process, you can take a roller, but only in this case it is necessary to bear in mind that then you will still have to paint many places with a brush.


