DIY wooden stools
Making a wooden stool on your own can be an interesting creative work or simple household chores. It all depends on the model that needs to be made: from wooden parts or thick plywood, you can assemble with your own hands the simplest seat for the kitchen, and a complex structure with transformer functions, and an unusual design product.
Similar articles:
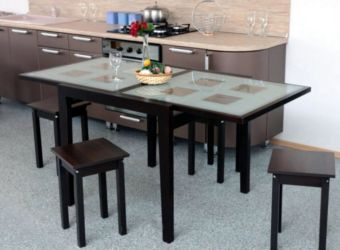
General view of the wooden stool
Any wooden stool is the simplest object for sitting. The varieties of these products are so numerous that it is impossible to list them: from wooden decks, smoothly sawn from the top side, to soft banquettes and ottomans.
The requirements for stools are the strength and practicality of each product.
In the manufacture of different models of stools, exact dimensions are not required. You can make a small copy of a large product (for a child) or change the proportions - you get a kind of short bench or bar stool. It all depends on the requirements of the master, who makes a stool for his needs.
What is required for manufacturing?
Creating homemade furniture allows the use of any available materials. The wood is quite cheap, easy to work with and highly durable, meeting all the claims of the carpenter in the manufacture of a stool for the kitchen or summer cottage. Therefore, it is easiest to do the job using lumber (bar, boards) or thick plywood. The product can combine both types of material.
Selection of materials
When creating furniture on your own, the quality of the material for the manufacture of the product is of great importance. You can also make a stool from scraps of commercial wood or plywood remnants, but they must meet the following requirements:
- For a stool, plywood of the FSF or FC series is suitable. It is desirable that the thickness of the sheets be at least 2 cm. For the seat, it is better to use polished or laminated plywood brands, otherwise the product will have to be processed manually.
- Solid lumber must be well dried (moisture content not more than 20%), otherwise the product will dry out during operation. For a stool, it is better to take inexpensive hardwood lumber (ash, linden, etc.) or hardwood furniture board. When using coniferous (pine) boards, there is a risk of getting a product whose seat will stain clothes with resin.
Both plywood and solid wood should not have cracks and rotten places. These defects affect the strength of the stool and spoil its appearance.


What tools will be required?
Wood processing requires special tools that are not available in every household:
- pencil and ruler, square;
- carpentry clamps (C- and F-shaped);
- hacksaw or jigsaw;
- drill with a screwdriver;
- rasps;
- chisels for wood, preferably in a set and of different widths;
- mallet;
- sandpaper.
For woodworking and cutting complex contours, you can use a frame hacksaw for metal. The canvas in this case is set with teeth towards itself.
To connect the parts, self-tapping screws, furniture dowel, PVA glue are used. Depending on the model of the stool, thorn-groove joints can be used, supplementing them with an adhesive composition.
A few words about the workplace
In the absence of a workbench, a stable table can become the workplace of a home master. There should be enough light in the carpenter's workplace. You need to organize it so that all the tools necessary at each stage of making a stool are at hand, but do not interfere with work.
Stages of making a stool
Even the simplest design is made in stages. When creating a stool for the kitchen, you need to follow these steps in sequence:
- marking and cutting parts;
- surface treatment;
- fitting and fitting parts of the structure to each other, elimination of defects and inaccuracies made during sawing;
- stool assembly;
- final finishing.
Before starting work, it is advisable to make a diagram on a scale and determine the parameters of the product: the height of the legs, the dimensions of the seat, the length of additional parts (prongs, tsarg, slots, etc.)
Part preparation
According to the drawn up drawings, it is necessary to mark the bars and boards, transferring the contours of the parts to the material in full size. If you need to make how similar elements of complex outlines are, then it is best to make a cardboard template. Simple legs for a stool or drawstring can be marked directly on the bar, laying off the desired length of the part along the ruler and making allowances for making a spike.
After marking, the details of the stool are cut out with a hacksaw or a jigsaw. In the manufacture of spikes and cuts, the same tools are used to connect elements, cutting off excess wood. To create grooves, you can use a drill: make several holes next to the recess area, and then use a jigsaw to connect them and remove the remnants of wood with a chisel and rasp.
After that, it is desirable to process all cuts and edges of the parts with emery or a rasp to remove burrs. The straight legs of the stool are often made narrower downwards, and to give them a slight inclination, the end of the part must also be cut off.
Fitting and assembly

The elements cut according to the drawing must be assembled into a structure, connecting the parts of the legs, inserting the drawstrings or prolegs into place. During pre-assembly, it turns out where inaccuracies were made during marking and cutting. With the help of rasps and a hacksaw, the parts must be brought to full compliance with each other.
When using the thorn-groove method, it is necessary to achieve a tight entry of the protrusion on the part into the recess intended for it. To achieve this, a tenon is sawn out a little thicker than the size of the groove, and then the connection is finished with a file. When all defects are found and eliminated, and the parts of the connections meet the requirements of the master, you can begin to assemble the stool.
Important to know: the assembly starts from the bottom. The legs of any model are connected in the right order, glued if necessary.
The seat is most often seated on dowels. To do this, a recess is drilled about 1.5 cm deep, a part of a wooden rod smeared with glue is driven into it. The remaining end is cut off, leaving 1.5 cm for connection with another part. Holes for dowels are drilled in the plane, glue is applied to the protruding parts of the rods and the seat is put on the bottom of the stool. With this method, there are no traces of fasteners on the front surface. Assembly on spikes and dowels is considered more reliable than connecting parts with self-tapping screws: the product does not loosen during operation.
If desired, the seat can be attached with self-tapping screws. Fasteners are screwed from the front side, so the heads need to be buried in the tree. Subsequently, the pits are puttied with a mixture of glue and sawdust, and then polished.
Exterior finish and decor
To make beautiful stools for the kitchen, wooden products are decorated with varnishing, painting or painting. Upholstery with furniture fabric, leatherette and similar materials can be a finishing option. The upholstery can be combined with the laying of soft filler on the seat. In this case, the stool will be soft.
High bar models are sometimes complemented by a small back. It does not carry a practical load, being rather a decorative element. The decoration itself can also become a detail: it can be cut from a saw cut of the trunk, given a concave shape or covered with decorative carvings. Sometimes, instead of a wooden seat for a stool, a wicker fabric is made from durable materials or even a mosaic is assembled from PET bottle caps.
Overview of designs for self-production
Using the scheme for assembling products, you can assemble a stool quickly and easily. The deadline for completing the work depends on the complexity of the chosen design: for the simplest ones, 1 day is enough, and more complex ones will require careful processing of details. But all the proposed options for making a stool will be within the power of even a novice carpenter.
classic stool
This is the most difficult variety, which will require notches and spikes. But the design of such a stool has stood the test of time and is the most durable. For classic models, both an oak massif and cheap woods were used, so you can make a stool from any boards 2-2.5 cm thick and 5x5 cm bars.
The algorithm for making a stool is as follows:
- Cut out 4 parts for the legs, tsarg (seat supports) and prolegs (crossbars connecting the bottom of the legs). The parts should be the same, so it's better to make templates. The length of the drawer is determined by the desired size of the seat: it should be 10-15 cm less than the side of the square. The height of the legs of the stool can be any convenient for a person, and the angle of divergence of the legs downwards depends on the length of the legs. If the proleg is equal in length to the tsarga, the legs will stand upright.
- Draw the ends of the tsargs and prolegs in the form of spikes 2-2.5 cm long. To do this, part of the plank must be cut down to form a protrusion that is narrower than the part itself. Grind the spikes with a rasp to the same size.
- Cut the legs for a stool from a bar, remove part of the wood with a planer or knife to gently and smoothly narrow the legs down. This is an optional part of the work, and the legs can be made the same thickness along the entire length.
- On two adjacent sides of the legs, mark the notches for the spikes of the tsarg and prolegs. In this case, the upper edge of the drawstring after assembly should coincide with the upper end of the stool leg. Prolegs are placed at a height of 15-20 cm from the floor, they can be made equally high or one opposite pair can be installed slightly higher than the other.
- It is convenient to choose recesses with a chisel or drill, followed by fine-tuning with a file. When selecting a groove, you need to make it a little smaller than necessary: this is useful for carefully fitting parts.
- Adjust the spikes so that they fit snugly into the grooves. Assemble the structure, check whether the length of the legs is the same, eliminate defects and disassemble the base of the stool.
- Lubricating the spikes and grooves with PVA glue, assemble the stool again and pull it together with a strong cord, wrapping the installation sites of the drawstrings and prolegs. Dry 24 hours.
- Make holes at the ends of the legs and the edge of the tsarg and insert the dowels on the glue.
- Prepare the seat: cut, sand the edges and surface. On the inside of the seat, mark the position of the dowels and drill holes so that they are not through. Lubricate the dowels with glue and connect to the seat. Pull off with a clamp and dry.
- Varnish or paint the finished stool.


simple model
This small wooden stool is best made from thick plywood, as it must be strong. You will need to cut 2 identical rectangles for the legs and 2 circles for the base and seat. The diameter of the circles should be slightly larger than the width of the leg design.
On rectangular elements, determine and draw center lines vertically and horizontally, mark the center of the part at their intersection. Then make cuts along the vertical lines to the center mark. The width of the cut should be equal to the thickness of the plywood.
To assemble, grease the inner edge of each cut with glue and insert the parts into each other so that a cruciform design is obtained. The edges of the parts must be at the same height.
Lay 1 circle on top of the legs, determine the places for mounting on self-tapping screws. Fasteners must enter vertically into the plane of the round part and into the edge of the base. For convenience, it is necessary to drill 4 through holes in the circle, into which screws are then screwed. Repeat the operation with another circle. The result is a light stool.
Based on this design, you can independently develop many varieties with figured legs, without a lower round base, of different heights. These varieties are simple and reliable options for stools for the kitchen - you can add and decorate to your liking.
With soft seat
To make a round kitchen stool with a soft seat, you need a piece of foam rubber large enough to cut a circle equal in diameter to a rigid base. For upholstery, you can take a durable fabric (flock, tapestry or other furniture). A second circle is cut out of it, the diameter of which will be larger than the first by the total thickness of the foam rubber and plywood, plus another 4-5 cm.
Lay foam rubber on the seat, cover it with upholstery fabric, and tuck its edges on the wrong side of the plywood base. Fix the fabric with a stapler or attach with screws to the bottom of the stool seat, first at 4 points located crosswise. Then, moving around the circumference and making neat folds, secure the rest of the canvas.
child model
A children's stool can be a simple smaller copy of a large one. If you make several of these chairs, you can cut out seats for them in the form of puzzle pieces. When playing, children will be able to assemble a table or bench from several stools.

Unfolded wooden transforming stool can turn into a small staircase. To assemble such a model, you will need to cut out 2 identical U-shaped parts for the legs (they can be made higher than for a simple stool) and a seat that also serves to connect the legs. In addition, you will need 1 prong from a bar or plank 2-2.5 cm thick and a steel stud with nuts. The length of the rod should be slightly longer than the distance between the parts of the legs of the stool.
For a folding ladder, you need to cut out 2 sidewall parts with 2 steps, 2 prongs and 2 step planes. The height of the ladder should be equal to 2/3 of the height of the stool. The product is assembled as follows:
- Connect the parts of the legs and the seat into a single structure. Fasteners - self-tapping screws or dowels.
- Install a proleg on one side of the stool, and on the opposite side, drill holes in the legs for the pin in the lower 1/3 of the height of the stool.
- Collect the ladder. Its width is slightly less than the distance between the legs of the stool. Connect the sidewalls by screwing the steps and prolegs under them to them. Determine the location for the holes in the sidewalls and drill them. Thread the stud through the legs and stepladder, combining the structure, screw the nuts onto the ends of the rod.
When folding the transformer, the stepladder must be turned over, raising its legs and turning them under the seat of the stool. If necessary, the ladder can be easily unfolded.
with drawer
A kitchen stool can be combined with a container for vegetables. To do this, cut out 4 identical walls and a bottom of the required sizes from plywood or chipboard. Connect these parts with self-tapping screws, screwing them into the plane of one side and the edge of the next. Attach the bottom piece to the bottom.
For the seat, cut out a square whose side is larger than the size of the base box. Small furniture hinges are needed to attach the lid. If desired, the seat can be upholstered and made soft.
high bar
Bar stools can be made according to the principles of simple models. It is only necessary to change their dimensions: lengthen the legs so that the total height of the product is at least 80 cm. For strength, it is desirable to make an additional tier of prolegs.
If everything is cut exactly and equally, the cuts of the hooks will fall on the ends of the free pin and the structure will be fixed in the unfolded position.
What do you do with old furniture?


