Do-it-yourself writing desk: saving the family budget and a unique piece of furniture
It is not so difficult to make it with your own hands. There are many drawings and videos on the Internet for this. In selecting the material for this article, we considered a number of different ways: from simple to more complex, requiring special skills. We tried to systematize everything we read and saw and make interesting material for you. We hope we succeeded. We present to your attention some of the most interesting and simple ways to implement.
What will we need?
First, let's decide on a list of tools and materials for manufacturing. Whatever desk we decide to make, the list of tools is about the same:
- electric jigsaw;
- drill;
- hacksaw;
- chisels;
- screwdriver;
- hammer;
- drill;
- milling machine;
- Grinder;
- clamps.
The last three points are used to make more complex models.
Materials can be very different, but, basically, it is a tree and its derivatives:
- Chipboard or chipboard, furniture board, boards, plywood;
- bolts and nuts with washers;
- self-tapping screws;
- wood glue;
- dowels and dowels;
- liquid Nails;
- paint and brushes;
- building level;
- tape measure, pencil, square.
Simple and stylish DIY desk
How to make a desk with your own hands?
When the necessary materials are purchased and the tools are prepared, it's time to decide on the model of the product. As we promised, we will talk about the most popular and easy to manufacture.
Of wood and similar materials
Wooden desks can be made with your own hands both from solid wood and from wood-containing materials. Natural products always look more noble and beautiful, but require special skills and abilities in the production process. In addition, they are more expensive due to the higher price of the material. Tables made of MDF, chipboard or furniture board are much easier to process, which does not require professional knowledge and is cheaper in cost. We will talk about both simple and complex ways to make a table with your own hands.
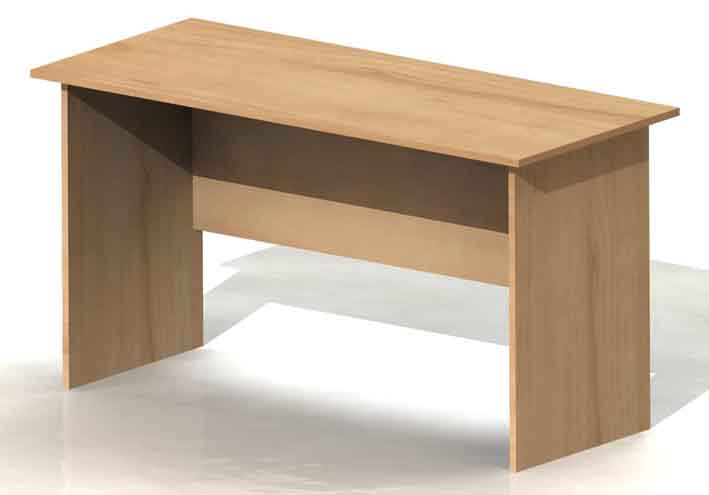
To begin with, we will describe step by step a simple way that even a person who decides to make something for the first time can cope with:
- we take a drawing of a table of four rectangular parts. It consists of a cover, two sidewalls and a crossbar;
- we go to the hardware store for chipboard. It is better to immediately buy a laminated board;
- you can order a cut to size right there in the warehouse, it is inexpensive, and you will bring home ready-made parts for your table;
- in case you refused to cut in the store, put the dimensions on the chipboard sheet and cut the parts with an electric jigsaw;
- we paste on the ends of the chipboard an edge previously purchased in the same place as the plates. By the way, if you ordered a chipboard cut, then you can paste over the edge in the same place. Planted on the butt using professional equipment, it looks much better and will last much longer;
- we take a drill and drill holes in the end parts - the future legs of the desk;
- then, with a slightly larger drill, we make a shallow groove over the hole for the confirmant's hat;
- we attach the transverse partition to the side legs with holes so that their upper parts are on the same level;
- we connect the structure with furniture screws;
- on top of the resulting base we put the countertop and also twist it with confirmations, having previously drilled holes;
- we close the recessed screw heads with special plastic plugs.
Thus, the simplest desk made of chipboard is completely ready. As you can see, a minimum of effort was spent, and no special skills were required. Now let's talk about making a desk for a student with your own hands, the drawings of which you will find at the end of the article.
DIY desk model
For a student
Now let's talk about a slightly more complicated way. But almost everyone can implement it at home. This table is ideal for use by a student. Detailed manufacturing instructions:
- we disassemble the old wooden pallet into separate boards;
- if you have an old hollow door lying around on your balcony or in the garage, then it will ideally fit under the countertop. If not, then you will have to cut out two sheets of thick plywood in size and connect them in thickness using self-tapping screws and glue;
- sawing boards under the supports. The simplest and at the same time spectacular looking legs are those in the form of construction "goats";
- the height of the supports at your discretion: from 70 to 80 centimeters;
- it is better to make the upper horizontal of the goat the same width as the working surface;
- the optimal size of the indent from the edge of the tabletop for attaching the legs is six centimeters;
- we measure the angle of inclination of the legs, it must exactly match the height of the supports;
- we install a horizontal bar between the upper parts of the legs, having previously drilled holes. We twist it with drywall bolts. Please note that the holes must be drilled with a slightly larger diameter than the screw itself, this is due to the fact that the legs are at an angle;
- at a height of about three centimeters from the floor, we fasten a wide bar (about twenty centimeters), it will significantly strengthen the supporting legs and serve as a platform for the shelves;
- we attach the last boards remaining from the pallet to the bar - the shelves are ready;
- we take the door and trim the sidewalls with a special edging, it is sold in furniture stores;
- from the bottom of the countertop we nail two parallel strips on each side. This is done so that the work surface does not drive over our "goats";
- heels on the legs can be made from wine corks and double-sided tape.
How to make a sliding desk with your own hands, we will tell further.
The ideal table for a student with their own hands

retractable
One of the most popular desk models is this. The modification that we will describe is a great example of an expensive homemade natural wood desk. Manufacturing scheme:
- we buy glued furniture board, always from hardwood;
- we take the drawing attached to the article and use it to mark up the details. Do not forget to make a small tolerance on the dimensions of the blanks;
- we cut out eight blanks for desk supports from the purchased shield. Their dimensions are 18x36x570 millimeters;
- we glue each leg of two parts and fix them with a clamp;
- cut out notches from the inside of all crossbars of the product frame;
- choose a long groove along the inner side of the tsarga (crossbar);
- on the upper side of the supports with a chisel and a hacksaw, we select a ledge to the height of the notch in the crossbar;
- in the sidewalls of the tsarg we drill two holes for dowels. Their diameter is eight millimeters;
- insert pencils into the holes and apply to the legs to mark the place where the dowels are inserted;
- we connect the base and supports with the help of dowels and wood glue;
- while the base of the desk dries, we cut the table top and top cover;
- select the grooves for fastening the upper right side. This operation is performed using a milling cutter. The width of the grooves is ten millimeters;
- with an electric jigsaw, we cut out the side walls of the superstructure according to the template. All sections are carefully sanded;
- we also select grooves in them;
- details for drawers are cut out of ten-millimeter plywood;
- glue them and strengthen the fastening with small nails;
- on the front part we attach a facing board, previously sawn out of wood. We fix it with small screws;
- from all the prepared parts we assemble a desk with a superstructure and drawers. We coat all blanks in the attachment points with carpentry glue. Leave the product to dry completely;
- we attach the table top to the base with legs with the help of dowels and glue in the folds we have cut in advance;
- after that, it remains to pick up the accessories for the drawers and varnish the table. Please note that we cover with varnish in two or three layers, but each new one is applied after the previous one has dried.
Photo of a handmade desk with drawers

Angular
The corner desk is one of the most functional. In addition, it occupies the usually unused area of \u200b\u200bthe room, freeing up space for other furniture. Here is a short description of making a simple one:
- we buy sheets of MDF or chipboard and ask in advance to cut it right in the store according to the drawing attached to the essay. Any shipping department of a building supermarket provides this service for a relatively small price;
- we connect the side walls with the tsarga with the help of dowels smeared with carpentry glue (PVA familiar to all of us since childhood);
- fasten with clamps;
- we nail the back wall of fiberboard with small carnations;
- do not forget that all visible sections of MDF or chipboard are cleaned with sandpaper and glued with an edge. As we wrote above, such a service can also be ordered at a construction hypermarket;
- we mark the inside of the tabletop for the place of attachment of the dowels;
- we drill holes for them, but so that they are not through, but remain deep enough;
- we smear the dowels with glue and put the top cover on them;
- after drying, turn the product over. Our corner desk is ready.
Now you know how to make a corner desk with your own hands, it's time to study the drawings with dimensions, diagrams and useful photo and video materials.


