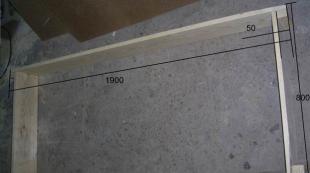
Do-it-yourself kitchen table - types and manufacturing technology
One of the simple types of furniture that you can make yourself is a table. For a summer residence, the simplest option is suitable. For the kitchen, it is worth exploring the existing options in order to make a table suitable for the overall interior. Below are the options for tables with drawings, manufacturing instructions.
Table dimensions are optimal for the kitchen
Before you start making a kitchen table, you need to decide on its size. In doing so, several factors should be taken into account. The size of the table is directly affected by the area of \u200b\u200bthe kitchen and the place where it will be located. It should harmoniously fit in the kitchen, be roomy, not interfere with cooking, and fully perform its function in the process of eating.
In order for a person to feel comfortable at the table, his personal space should be at least 70 cm, that is, there should be no one within a radius of 30 cm. For a family of four, a 90x90 cm or 100x100 cm table would be optimal if it can be moved away from the wall or placed in the middle so that everyone has their own side.
If it is impossible to move the table, and the dimensions of the kitchen do not allow the installation of a table in the middle, you can install a rectangular table with a side length of 120 cm, a short side of 70 or 85 cm. Two will sit on the long side, and two one at a time on the short sides.
If the size of the kitchen allows, then it is better to install a large dining table with side dimensions of 160, 180 cm, short - 90 cm. It will be free to sit at such a table on ordinary days, and during events with guests it can accommodate 10-12 people.
For small kitchens for receiving guests, a transforming or sliding table will come to the rescue. In such furniture, inserts with a width of 40 to 50 cm are provided, which are inserted into the middle of the table. There can be up to three inserts, they are usually hidden under the countertop. The length of the sliding structure can reach 280 cm, when folded - 180 cm.
The height of the table depends on the size of the people sitting at it: height and build. Usually they are made with a height of 700 mm, but options from 60 to 80 cm are possible. When choosing a table, you need to consider its location. When moving the hostess in the kitchen, she should not be disturbed by those sitting at the table.
What role do the legs play and their number?
Determining the size of the table, you should pay attention to the type and number of legs. There may be a different number of them:
- One massive leg is suitable for products of small sizes. More often these are tables for gazebos, children's, small-sized kitchens. For stability, they make a reliable cruciform harness that can cope with heavy loads.
- Two massive legs are used for oval and rectangular tables. They are installed at an optimal distance from each other. Usually such legs are narrow at the top and widen towards the bottom. They are convenient in that people sitting at the table do not collide with legs.
- The most popular dining table is a rectangular shape with four legs. This is convenient for the folding option. No need to come up with any complex designs and do specific calculations. The table is quite stable and reliable if the length and dimensions of the legs are correctly calculated. They must be the same so that the table does not stagger or warp during use.
The legs for the table can be tightly fastened to the drawers, or they can be detachable. The second option is convenient for storage and transportation of the product. The countertop in this case must be reliable. True, the design of a table with detachable legs is more complicated.
Tree selection - species characteristics
Currently, there are many building materials from which you can build a kitchen table. But the most affordable and reliable option is wood. A do-it-yourself wooden kitchen table can be made by a person with minimal carpentry experience. It is important to choose the right tree that is suitable for this.
From the choice of material for the countertop depends on its durability, resistance to mechanical damage, decay.
Wood varies in density, it can be soft, hard and the hardest. Softwood tops may have scratches or marks, although this depends on how the table is used. Hard rocks are more difficult to process.
Soft breeds are often used: spruce, poplar, alder, pine, fir, cedar, juniper, horse chestnut. Hardwoods are: birch, oak, fruit trees (plum, apple, quince), walnut, elm, ash, maple. The hardest varieties include: yew, dogwood, acacia, boxwood, iron (stone) birch.

The best option for the kitchen is oak. It is durable, strong, easy to process, varnished, not resistant to decay and deformation, ideal for wet rooms. Larch has healing properties, but since it has to be treated with protective substances, it releases healing phytoncides to a lesser extent. Juniper is not used, as there is little of it left in nature. Horse chestnut is used for landscaping.
For countertops, it is best to use walnut, pine, oak, wenge, for legs - birch, for dowels - boxwood and acacia. Countertops can be made from laminated chipboard, plywood, MDF. The ends of these materials are covered with melamine film or special PVC. These materials are less strong and durable, not as environmentally friendly as solid wood, but are easy to process and have a low cost.
Table models - types and configurations
By design, there are four types of kitchen tables that you can make yourself: regular, folding, sliding and prefabricated.
A regular table can be oval, rectangular or round. This is the simplest option in terms of design, but its manufacturing technology is not so simple. There are many nuances associated with the ability to use carpentry tools. It is necessary not only to correctly assemble the product, but also to decorate it beautifully. The next step is varnishing.
Round tables are suitable for large kitchens and living rooms, they are located in the center of the room. The main problem is that they take up more space. You can’t put them against the wall, because in order to sit at a round table, you need free space. The round shape of the tabletop makes it possible to vary the number of legs: there can be one, two, three or four. The option with two legs is not suitable, since this design is not stable. You can install a round table in a small kitchen, then the countertop should be no more than 90 cm.
For compact kitchens, a small oval table is suitable, which is conveniently placed in a soft kitchen corner. A more common option is a medium or large table that fits well in the average apartment. At the same time, a lot of people can sit behind him. If the dimensions of the room do not allow you to install a large oval table, you can resort to a sliding option. When folded, it can even have a round shape.
The transforming table is most often a compact bedside table that can be attached to the wall. They occupy no more than 60 cm. From 10 to 15 people can fit at the unfolded table. To make a transformer table, you will need special tools and the ability to use them. Therefore, it is difficult to make it yourself.

The simplest version of a homemade table is a book table. It is easier to make it from laminated chipboard, the sawing of which can be ordered at a special factory. From the finished parts, you can independently assemble the table. Parts of the tabletop are attached with hinges. You can take wood as the material of manufacture, but this will complicate the process.
The sliding version is also easy to manufacture. A feature of such a table is that its dimensions increase due to the insertion of an additional panel into the middle of the tabletop. To do this, you need to push the two halves of the countertop and insert a panel between them. The parts are connected with wooden dowels. Sliding mechanisms can have a different design. Older models did not have roller guides or full rollback, so you had to make an effort to push the tabletop apart, as the wooden parts rubbed together.
In modern models, a special mechanism is used to roll out parts without damaging wooden surfaces. The simplest version of the mechanism is two metal guides, which can be used as furniture slides for drawers. Additional sections are folded to be stored under the table top. To fix them, you can make special fasteners.
In factory sliding tables, additional sections connected by hinges are folded and hidden under the tabletop thanks to a special mechanism. To do this, the table has an additional false tabletop with a hole in the middle.
A folding table is a tabletop with a pair of folding legs, which is attached with hinges to a wall or furniture. The greatest difficulty is the manufacture of folding legs. Although there are ready-made options for such legs, which can be purchased at stores selling furniture fittings.
Organization of the workplace - selection of materials and tools
For joinery work, you need to choose a special room, since a lot of dust and debris are generated during work. Wood requires treatment with special protective substances that emit harmful fumes, so the room should be well ventilated, it is better to organize a forced operation. You can work in the garage, but the presence of sawdust and dust will not have the best effect on the car. The best option is a barn. If it is not there, then it can be built - it will be useful in economic activities in the future.
Having found a room, you need to prepare the necessary carpentry tools and related materials:
- plane;
- hacksaw;
- drill;
- jigsaw;
- fastening tool;
- carpenter's hammer;
- mallet;
- chisel;
- bit;
- milling machine;
- grinder;
- sandpaper;
- paint brush;
- wooden boards;
- corners;
In addition to carpentry tools, it is necessary to prepare measuring tools: a ruler, square, pencil or marker, construction tape.
To produce a countertop, you need to prepare a furniture board with a thickness of 4 to 5 cm, a width of 60 to 80 cm. The length is selected based on personal preferences, usually it ranges from 120 to 140 cm. boards. The boards must be glued together or connected in another way.
For the legs you need to prepare a square bar. The most suitable beam is 60x60 cm or 70x70 cm in size. Ready-made curly legs can be purchased in specialized stores. To stiffen the structure, you need to purchase a beam with a section of 40x40 cm and a length equal to the size of the countertop around the perimeter.

It is possible to protect wood from decay for the entire service life by treating it with a water-polymer emulsion (WPE). It is necessary to process the parts twice with a break of 3-5 days. After WPE treatment, even birch plywood does not delaminate and becomes suitable for front panels.
Nitrocellulose furniture varnishes are being replaced by water-based acrylic varnishes, which are safer to use and have better characteristics. This also applies to glue. PVA gradually replaces wood glue and BF-2. True, it must be applied to both sides in contact and left connected until drunk under the yoke of 1-3 days, but for use at home this is acceptable.
Furniture blanks can be pre-protected and tinted with a stain or painted with special paints with a lacquer base or non-paint oil and water-based lacquer dyes. The starter from varnish and paint is prepared in advance, stored in a tightly closed container, and then added to the varnish until the desired tone is obtained. Colored varnishes are mixed on oil paints and NC according to the rules for mixing paints for painting. Acrylic paints can be mixed without restrictions.
Start of work - drawings, preparation of parts
Before you start making a dining table with your own hands, you need to carefully consider what it will be like: shape, dimensions, design, technological solutions. At the design stage, the appearance of the table and the degree of its convenience are determined. It should harmoniously fit into the kitchen space, not interfere with the movement of people, fully fulfill its main function - accommodating people for eating.
Before making a table, you need to draw a sketch and create a diagram according to which the components will be assembled. You can use ready-made options, choose the most suitable one and be guided by it. But if you want to show your imagination, you can create your own individual sketch, make the appropriate calculations and diagrams. It is important not to make mistakes in the calculations in order to get a reliable, durable and stable design.
Below are the finished drawings with dimensions.

In the process of manufacturing any wooden structure, you need to prepare the details. To do this, follow these steps:
- Canvas preparation. It needs to be sanded, cleaned, treated with antiseptics and fire retardants to protect it from moisture, fire and decay.
- If wood cuts are used for the table, then they must have optimal moisture content. They must be carefully reviewed before use. If there are cracks, they must be carefully repaired.
- The main details of the table: tabletop, legs and stopper are transferred from the sketch to the canvas, and then cut out.
- Details that are designed for support legs and slats are made 3 cm shorter. On the legs you need to make horizontal cuts on each side. Processing depends on the type of fastening of the legs to the table top.
When all the elements are ready, you can start assembling the table. If a more complex design is provided, then additional parts and mechanisms must be prepared.
We fasten the legs in pairs with short jumpers. To do this, we drill two inclined holes on the inside of the crossbars. When drilling, be careful not to damage the legs. We fasten the structure with self-tapping screws, screwing them through the legs and bars. Then we fasten the legs with long jumpers. We also twist the elements with self-tapping screws. It is better to fasten the legs to the table top with bolts, having drilled the appropriate holes in advance.
We make the main element of the table - the countertop
Particular attention should be paid to the main element of the table - the table top. It must be reliable and durable. The reinforcing bar should be mounted exactly according to the markup, taking into account the location of the legs.
The best option is to buy a finished postforming countertop. Manufacturers offer slabs with a wide selection of textures, sizes and colors. Postforming is a profiled laminated chipboard with rounded ribs. The advantages of using such a stove for the kitchen are as follows:
- High wear resistance, resistance to mechanical damage and high temperatures.
- The postformed worktop has a drip tray where dirt collects and is easy to remove. This ensures high hygiene.
- There is no need for edging the slab, which is a labor-intensive process.
- Ease of processing. If it is necessary to saw the postforming, then it is processed in the same way as wood or chipboard.
- Thanks to the rounded ribs, mechanical stresses are distributed evenly over the entire tabletop, which is important if the table is made with a load-bearing tabletop.
The use of postforming simplifies and speeds up the manufacture of the table, but solid wood or a furniture panel looks more solid.

If it was not possible to purchase a finished countertop, you can make a typesetting with your own hands. To do this, you need a long jointer and a hand mill. It is better, of course, to perform processing on milling and jointing machines. In the absence of the necessary tools, parts can be ordered from a carpentry workshop, providing exact dimensions.
Making a countertop consists of the following steps:
- 1. Prepared boards must be adjusted to the required size so that they are the same width and length.
- 2. Next, we lay out the boards on the working surface like brickwork: the middle of each board fell on the junction of the previous ones.
- 3. When the material is laid out, you can start making the countertop. Mating surfaces should be well machined and sanded. Then we glue the rows of boards with wood glue or PVA and three clamps. You can glue up to 6 rows at a time. Leave blanks to dry completely.
- 4. Then we remove the irregularities with a planer and grind the surfaces with medium and fine-grained sandpaper. We remove the chamfers and round the corners.
An interesting version of the countertop, decorated with furniture tiles or a block of solid wood. To do this, using manual milling or a chisel, a cavity is made with a depth equal to the thickness of the tile. Along the perimeter of the tabletop, you need to leave a side with a height of about 50-10 mm. A tile is glued onto the prepared surface with glue. To make the structure stronger, a bar is attached to the perimeter with self-tapping screws.
Assembling a table from a tabletop, legs and jumpers
Below is the assembly of a simple kitchen table with a countertop, the manufacture of which is described above. In addition to the tabletop, you need to make 4 parts for the legs.

In each manufactured element, we drill holes into which the fastening bolts will be inserted. On the vertical and horizontal parts of the supports, the holes must exactly match each other so that they can be screwed together. For the manufacture of supports, plywood or OSB with a thickness of about 16 cm can be used.
To make the structure durable, we mount a jumper between the legs, it will prevent them from moving apart. The jumper can be made from the same material from which the countertop was made. At first, it does not need to be fixed. This can be done when the table is fully assembled by screwing in one self-tapping screw from each end of the vertical support. Next, install the brackets for the legs and additionally fasten the countertop with bars. Brackets for better aesthetic perception can also be made from OSB or plywood.
To give the table an external massive look, we mount a frame for sheathing the tabletop with a frame. To do this, we fasten the rail around the perimeter, screwing it with self-tapping screws. In the rail, pre-drill holes for furniture dowels (chopics) at a distance of 30 cm from each other. When the slats are screwed, we insert dowels into the holes around the perimeter of the tabletop. We ennoble the countertop along the perimeter with a solid wood rail, the thickness of which should be about 3 cm. It is put on the dowels, having previously applied glue to the adjoining sides. Next, turn the finished countertop over and attach the legs to it, which we fix with bolts.
After complete assembly, all fasteners should be checked. There should be no backlash anywhere.
The advantage of this prefabricated structure is that it is easy to disassemble and reassemble. This is useful when updating the table. Having disassembled the table, the old coating can be removed from each part, sanded and varnished or painted again.
Guiding the external beauty of the table - finishing
All wooden parts that will be used to assemble the table must be carefully sanded and polished so that the surface is perfectly smooth. This makes it possible to emphasize the natural beauty and texture. To make a dining table, you need to take high-quality wood that can withstand the load. If the wood has defects, they can be leveled, puttied and decorated with acrylic paint.

When the table is fully assembled, you need to give it a beautiful appearance. This is achieved by coating it with stain and varnish, and the more layers of varnish are applied, the more beautiful the wooden product will look. Varnishes serve as additional protection for wooden parts from mechanical damage, premature aging, and allow you to extend the life of the product.
Painting work is carried out in stages. Before applying varnish or paint, the work surface must be cleaned of dust and dirt. Then stain or varnish is applied. By adding dyes, the varnish can be given a certain shade. Dry the wood after coating the varnish should be at room temperature.
The table can be painted, pre-treated with a primer. The choice of color depends on personal preference. It is important that the kitchen table is in harmony with the overall decor. It is better to choose a water-based paint, it dries well and is almost odorless.
In order for wooden furniture to serve for a long time and have a beautiful appearance, it needs to be looked after. Furniture with a polished or lacquered surface requires more careful care, as scratches can easily appear on it. Poorly tolerates such furniture contact with hot. For care, universal polishing compositions are used. Plastic-coated chipboard and MDF countertops can be washed with detergents.
A do-it-yourself dining table can become the pride of the owner, as he puts his soul into it when making it. In a company sitting at such a table, a sincere and warm atmosphere is created.
