How to make a wooden stool: ideas and an example of self-assembly
Everyone knows the expression: "simple as a stool." There is a fair amount of truth in it. This piece of furniture in its classic design is concise and strict.
It is difficult to do without a stool in the kitchen and in the workshop, in the garage and in the bath. It is needed wherever cramped conditions do not allow placing more dimensional furniture. For a home craftsman, making such a thing is the best way to get practical skills in carpentry.
In this article, we will introduce you to the varieties of wooden stools and tell you about the features of their self-production. We hope that after that you will be able to confidently get to work and delight your family with this useful piece of furniture.
Before you make a stool with your own hands, you should learn more about what carpentry masters have come up with in this area. To begin with, we will study the sketch of a simple product and remember the names of the main parts. This will help us to speak the same language using common terms.

So, the classic stool consists of a seat and four legs. The bars of the upper belt serve as a support for the seat and are called the tsarg. The lower stiffening belt that connects the legs also consists of four bars, called prolegs. By experience, the craftsmen established the optimal dimensions: height 50 cm, seat width 45 cm.
Stools from logs, saw cuts and branches
Having abandoned the legs, the seat can be made from an ordinary log. Having cut it into several logs and providing each with a soft lining, we will get an original set for a country holiday.

The disadvantage of this solution is obvious - a lot of weight, which creates inconvenience when carrying.
And here's what you can do by combining wooden legs with a massive seat made of rounded log trim. This unusual stool claims to be a designer find.

There are no tsargs and prolegs here. The rigidity of the structure is ensured by a massive seat, into which four legs are cut into 1/3 of its height.
Anyone who is good with a chainsaw can create an original piece of furniture from a log. To do this, in a thick block of wood, you need to make three neat side cuts that form the legs. Having made an accurate marking on the scraps of one trunk, you can cut out of them a set of two stools, nested one into one.

Continuing the "forest theme", let's see what can be built from the material lying under our feet. A beautiful product can be made from thick branches, freed from bark and polished. This design has one original detail - a drawer for household items, located under the seat. The lid is assembled from planed boards, planted on wooden spikes and glue.

This piece of furniture will fit perfectly into the rustic interior style, which is characterized by massive wooden beams, stairs and tables. But in an ordinary kitchen, he is unlikely to take root.
Saw logs - a finished seat for a stool. By cutting three legs of thick branches into it, we get a solid and pretty design.

Hemp and forks of trunks can be used as bases for the manufacture of original products. Polished and crowned with thick log cuts, they fit perfectly into the interior of a log hut.

Traditional simple stools
Not aging classic lives not only in the facades of buildings. Time-tested solutions are preserved in the designs of stools. Adding smooth lines to their appearance eliminates boring angularity.
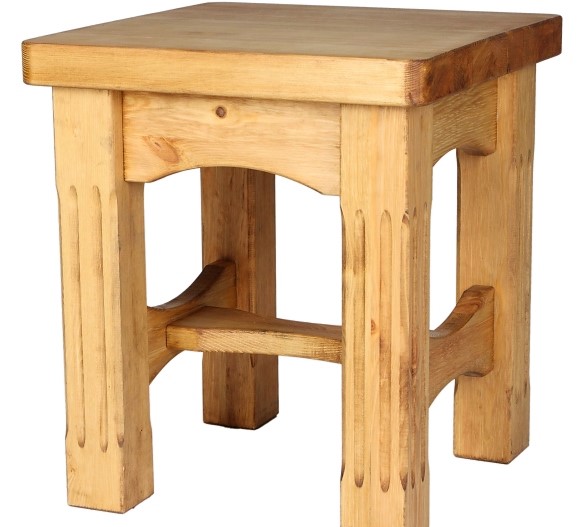
In the photo below we see the classic version. Thanks to the rounded tsargs and prolegs, it looks quite decent. Milled grooves on the legs also improve its appearance.
There is beauty in simplicity. Designers successfully play with this quality, creating deliberately rough brutal products. Artificially aging furniture is not an easy task. Above the product, the photo of which we see below, the author had to work hard.

The category of classics of "stool design" includes designs with drawers under the seat. To do this, use wide sidewalls-tsargi and hinged covers.

Refinement and originality
Not everyone likes the hard seat and the angular shape of the stool. Fans of aesthetics and comfort masters offer elegant products with curved legs and soft upholstery.
It is difficult for a beginner to make bent curly legs. Without sacrificing beauty, they can be replaced by two pairs of crossed bars connected by a crossbar. But to abandon the soft foam upholstery should not be.

Let's ask ourselves the question: what do you need to assemble a homemade wooden stool? Four thick boards for the seat, legs and crossbar. Having decorated them with carvings, we will get an exquisite and solid product. You can use it with pleasure at home, and if necessary, make it an exhibit of an exhibition of folk crafts.

If you are going to make your first "masterpiece", do not forget about the use of firing, stain and varnish for decoration. Even the simplest piece of furniture acquires a noble gloss after finishing by contrasting toning.

In addition to natural wood, stools can be made from chipboard and thick plywood. This solution reduces their weight without loss of strength. In the photo below we see an interesting plywood construction. Slotted holes in the seat and legs give it beauty and delicacy.

Square, round and oval seats are yesterday's carpentry art. Today, original solutions are in fashion. From them you can assemble a bench of any length and configuration. Invite your friends over and show them this miracle. Among them, there will certainly be those who want to play an unusual furniture "constructor".

bar stools
The one who believes that the stool must be low and nondescript is mistaken. Designers successfully prove otherwise. A little imagination and a familiar piece of furniture becomes a “fashionable thing” in the avant-garde style.

The high stool shown in the picture is a bar option. They can decorate the interior of the cafe and the decor of your own apartment. Its lower counterpart, made in the same style, will take its rightful place at the dinner table made of euro pallets.
Nowadays, bar seats are popular not only in catering establishments, but also in home environments. The tradition of placing bar counters in apartments that came from across the ocean caused a real boom in these products.

A high stool is convenient not only for drinking cocktails at the bar. It can be successfully used as a fruit picking stand.

Folding stools
There is a huge variety of their varieties from the simplest solutions to very complex transformers.
Your attention is invited to the original folding design. It consists of two rectangular frames-legs connected in the center by a metal axis. Support frames are attached to the seat with carpentry hinges. When folding, the axle moves along two grooves cut into one of the legs. The seat turns on its hinges and stands upright.

And here is another version of the folding stool. The seat is made of two halves. When folding, the legs rotate around the axis and are placed in the same plane. The halves of the seat are pressed against them from both sides.

Fans of complex folding systems are offered an option consisting of eight pairs of lattice legs connected at the base by a common bar.

The upper ends of the legs on one side are pivotally connected to the seat, which is also made of bars. To fold the structure, it is taken by the lower bars and shifted in the opposite direction. In this case, the slatted legs and seat bars enter the gaps provided for them, and the stool becomes flat.
Another option is a folding stool with a "caterpillar" seat. Despite the simplicity of the design, it looks very original. Its two crossed legs are pivotally fastened in the center, and connected from above by a wooden segmental seat. Holding the edges, you can easily fold and unfold such a stool.

An example of self-production
Having finished the brief review, it's time to start the practical part. We offer you a step by step guide. Let's say right away that it is better for beginners to refuse joints of the "thorn-groove" type. They require good carpentry skills and the availability of a special tool - a milling machine or, at worst, a manual router.

You will need a few tools to get the job done:
- Roulette or ruler;
- Hand saw with a small tooth;
- Electric jigsaw for cutting legs and seats;
- Screwdriver for drilling holes and tightening screws;
- Belt sander for smoothing sharp edges on parts;
- PVA glue or wood glue.

Step one- using a hacksaw from a planed pine board with a thickness of 30 mm, we cut blanks for the legs and the seat. If there was not a board wide enough to make a one-piece seat, then it can be assembled from several narrow scraps. To do this, in their side faces, you need to mark and drill holes for the dowels. After smearing the dowels with glue, they are inserted into the boards, assembled into a single shield and fixed with carpentry clamps. A day later, you can start making the seat.
step two- cut out the profile of one leg from thick cardboard and transfer it to all blanks. We do the same with the seat blank.
Step Three- we cut out the legs and the seat with an electric jigsaw, after which we process their sharp edges with a grinder.
Step Four- we assemble the legs in pairs, screwing the screws into their ends. To connect pairs of legs to each other, we also use self-tapping screws. We arrange them so that they do not meet with previously twisted ones.

Step Five- marking holes for dowels on the legs and seat. Having done this work, grease the spikes with wood glue and put the seat on the base.
Anyone who wants to simplify the work a little can refuse to fasten the seat with dowels. Instead, you can screw four screws into the legs from above directly through the cover. In order for them not to stand out on a flat surface, pre-drill shallow hidden nests for them. After twisting, putty them with carpentry putty and cover the product with varnish and stain.


