Extension to a wooden house: projects, photos and professional advice
Sooner or later, every homeowner begins to think about expanding the living space. And here a lot of questions arise, the main one of which is how to do it? Nowadays, the range of materials on the construction markets is quite impressive, which means that there are plenty of options for how to increase housing. Today we will look at some of them. We will find out what an extension can be (projects and photo examples will help in this), and also try to understand how difficult such construction can be. It doesn't hurt to learn how to do this kind of work yourself.

On the Internet you can find various projects of extensions to the house. And before starting such construction, it is worth familiarizing yourself with them. This will allow you to adopt any solutions, and then add your own. Only then can you get a unique building that will not only be, but also increase your living space.
Many may say that such construction is too labor-intensive and almost impossible to do on their own, but this is a delusion. With the right approach and the study of all the nuances, this is not so difficult, although you will have to face some difficulties. But, as they say, the eyes are afraid, but the hands are doing. But as a reward, you can get not only a do-it-yourself extension to a wooden house, but also satisfaction from the work done. In addition, the funds saved on the remuneration of specialists will not be superfluous.
Let's consider various options for extensions in general terms, as well as examples of similar work done by ordinary home craftsmen without any experience.

Solutions for adding a veranda to a wooden house in photo examples
Such a building is quite relevant for summer residents who love to sit in the evenings over a cup of tea with family or friends. After all, it is much more pleasant to communicate in the open air than in a closed room. In addition, it is possible that the veranda will be thought out in such a way that it is possible to install. This will protect it from snow, as well as add warmth to the house itself.
Another plus of such a building is that for the winter period you can spend there. In this case, it can even be used as an additional room. But this is more suitable not for summer residents, but for owners in the private residential sector who live indoors for a whole year.
The material for such buildings is most often wood. Sometimes, if there is such an opportunity, it is made on those sides that do not adjoin the house. We offer you to see a few photos of wooden verandas attached to the house:
Looking at these photos of wooden porches attached to the house, it seems that they are built by professionals, but they are not. Today we will definitely consider how you can do this with your own hands.
Variants of terraces attached to the house - how do they differ from the veranda
You should start with what many confuse. But the differences here are fundamental. The fact is that the veranda is always attached to the house, but the terrace opposite is located and does not adjoin the house. In addition, terraces are often without a roof and walls. At their core, they are open. Hence the consequence - they are built more often from a more durable material that tolerates precipitation.
Of course, there are options for adding terraces to wooden ones, but this is rather an exception. At the same time, if we go back only a few decades ago, then at that time it was an open (without a roof) platform of natural or artificial origin that was considered a terrace.
Now many people confuse these two concepts, calling verandas adjacent to the house as terraces on stilts, but this is still not true historically. Although time does not stand still, a person is trying to make his life more comfortable. This is probably why they called the terrace a platform with a roof adjacent to the house. After all, it stands on stilts, while the veranda must have a foundation.
Here are some examples of terraces in photo illustrations:
How to attach a garage to the house and what is it for
Adding to the house is a very good solution. Indeed, in this case, in the cold season, there will be no need to go out into the cold to reach it. However, even here there are pitfalls. The garage needs an ideal one that will not allow carbon monoxide to enter the home. And the fact that the car will start in the garage for sure, no one doubts. Here are some photos of garages attached to the house:
Adding a garage to the house is not an easy task, but it is quite feasible. It is only necessary to understand how capital it will be. Do I need a foundation, what will be the floor and walls. Most often, the material for such buildings is a foam block. But many, as a garage attached to the house, use several racks of timber, on which they rely. Thus, although the car is not protected from snow and rain in the wind, the roof will save it from the sun.
Examples of residential extensions to a wooden house
Attach to a wooden house as a living space or - this is perhaps the most common type of all listed. This is not surprising, because not everyone has the opportunity to buy land, build a new large and spacious one. And the construction of an additional room is possible even in a relatively small area. But here the situation is a little more complicated than with the construction of a veranda or carport. Do not forget that the building should not only be capital, but also enough so that you can live in it comfortably.

Important! When erecting such an extension, it is necessary to carefully study the soil, calculate the foundation that can support the weight of the structure, and also draw up a detailed project. Do not forget that such a capital structure must be registered with the cadastral chamber. Otherwise, you can not only lose money on fines, but also receive a notification about the demolition of an illegal building.

And yet, extensions to the country house are a good solution. After all, no one bothers to collect all the necessary papers in time. And the extra living space has never bothered anyone. In addition, it does not require too much money.
Extension to a wooden house: projects, materials and photos of possible layouts
Making an extension to the house with your own hands, although difficult, is quite possible. But this will require some knowledge. The main thing that needs to be decided before undertaking such work is what material the structure will be made of. The material can be the following:
- Boards on a frame made of timber. Such a building needs a minimal foundation;
- Rounded timber or logs- such a building also does not require too strong a foundation. The fact is that its lower crown will already play the role of a support. In addition, such a structure will be warmer and more durable, but at the same time more expensive;
- . Here you need a very strong foundation that can support the weight of the building. Otherwise, the extension will begin to collapse in a year or two, and may not even stand for 3 months. It all depends on the soil;
- - it also requires a solid foundation, perhaps even stronger than for a foam block. As a result, such extensions are very expensive.
Important! Regardless of what material it was decided to build a residential extension in the country, it needs to be firmly fixed to the house itself. Otherwise, the building will not have the necessary strength. In this case, there is a risk of collapse, and this is already life-threatening.

Let's try to deal with each of these materials.
Extension to the house from the frame: the nuances of construction, design and photo examples
An extension to the house is convenient in that it requires the least cost and is easy to do with your own hands. Moreover, there is no need to work with a large number of people - two people are enough. But still, a foundation is needed.
It is also convenient to make a frame extension to the house due to the lack of the need to hire a designer who would calculate everything. This is another budget savings item. Of course, the extension will need to be insulated very high quality, but with a huge assortment on the shelves these days, this will be quite easy to do.
The most difficult stage in such construction will be the construction of the foundation. Well, it’s much easier to assemble the frame, fix it to the wall of the house and sheathe it. Today, there are easier ways. On sale there is a special material. These are oriented strand boards. Moreover, with their help, the so-called one is made at the factory, the two sides of which are OSB, and between them is a layer of foam. Such material is quite durable and strong, in addition, it has another important advantage - it is an excellent insulation. Thus, the home master can only assemble a solid frame and sheathe it with similar material.
In such cases, the exterior finish is also important, because the durability of the frame extension to the wooden house largely depends on it. You can read about similar work in our other articles. And now we invite the dear reader to look at a few photo examples of such extensions made by home craftsmen:
An extension to a house made of timber - some installation nuances
When planning an extension, it should be understood that both its foundation and service life depend on how it is designed. After all, no one will start construction with the expectation that in a couple of years the living room will need to be demolished. Also, do not think that with the design of such buildings you can not "bother". This is not a barn or closet, which means that everything should be taken care of in advance.
Let's start with the fact that the best option (of course, with a small weight) would be a pile-screw. It will be a cheaper and not too labor intensive choice. Yes, and you can drive piles into the ground to the required depth yourself with the help of special equipment or even manually. The main task here is to calculate the load on each pile to select their number and diameter.
Important information! When constructing a pile-screw foundation, it should be understood that the supports must pass under each wall. If there is a partition in the room, then under it they are also required.
You should pay attention to the lower crown. It must be made from a more durable one. Ideally, if it is from logs. You should not think that only 3 walls are needed to install an extension from a bar to a log house - this is a delusion. 4 walls are also being built, because a joint one is also needed here. It makes sense to pay special attention to the fastening between common walls. It depends on this whether cracks will appear in this place over time.
Here are some photos of examples of such solutions:
Extension to the house of foam blocks - advantages and disadvantages
This is probably the most common option. After all, the foam block has a relatively low cost, it can provide quite good insulation (in comparison with a brick), and the installation speed is considerable. But when compared with a bar, the foam block has a big drawback - it requires a fairly strong foundation. And already pile-screws are indispensable here.
The foundation for an extension from a foam block to a wooden house is necessary. The best option here would be a grillage pile foundation. This means that the cost of the foundation automatically increases significantly.
Installation of extensions to houses made of gas silicate blocks is also quite common. But some home craftsmen do not understand the difference between them and foam blocks. Everything is pretty simple. slightly heavier and more expensive than foam concrete, but at the same time its strength is much higher. In addition, it does not require a hitch from a concrete solution (special glue is used). As a result, there are practically no seams, which contributes to greater thermal insulation, and therefore lower heating costs in the future.
Important! Regardless of what is chosen as a building material, communication systems in the future living room should be considered. After all, if this is not done, you will have to hammer holes for heating, ditch the walls for electrical wiring. Without this, there can be no talk of any living, especially comfortable.
We offer the dear reader a few examples of such buildings:
Extension to a brick house - differences from previous options
The main difference here is that no fourth wall is required. This means that three common ones are quite enough. The foundation can be either tape or columnar. Yes, and you can choose any material for construction - it all depends on the wishes and capabilities of the home master.
Coupling with the bearing wall of the house occurs with the help of. When building an extension to a house made of brick or concrete, a reinforcing hitch is also often used. The bearing wall is drilled with a puncher, while the drill should be slightly smaller in diameter than the rod for a more rigid hitch. After that, a piece of reinforcement (it should not be smooth) is driven into the drilled hole up to half, and its second part is laid into the joint of foam blocks or bricks.
Important information! You should not start building if the house is quite old. This is irrational, because the brick softens over time, which will have a bad effect on the coupling with the new structure. In addition, the drilling of the wall, as well as the new building, create an additional load on it.
It may be interesting for a respected reader to look at some of the solutions of home craftsmen:
The device of the foundation for an extension to the house and its types
The foundation is the foundation that holds the entire structure. So, you should treat his device with great responsibility. The simplest solution with a small weight of the building will be the installation of a pile-screw base. To do this, at a certain distance from each other, piles are screwed into the ground, which will carry the main load.
If the building is heavier, you will have to fill in the strip foundation. At the same time, piles also do not interfere, they will give additional strength. But the most durable of all types of foundations can be called a pile-grillage foundation. For its device, you need to dig a trench around the perimeter of future walls. After that, screw piles are already driven along this trench or wells are drilled into which the reinforcing cage is lowered and poured with concrete. This is done in such a way that their upper edge is slightly above the ground level. And the last step is to install the formwork and pour concrete. For more information on how to make a foundation for an extension to a house or for a bath, see one of our articles.
Before you pour the foundation for an extension to the house, you should decide whether the finished solution will be ordered and delivered ready-made or made independently. In the latter case, precise calculations of the components are necessary for its required strength.

How to make a roof for an extension
The simplest option would be a shed roof for an extension to the house. This option is easy to implement and requires the least cost. However, this work also has its own nuances. When compared with gable ones, the simpler ones do not retain heat so well.
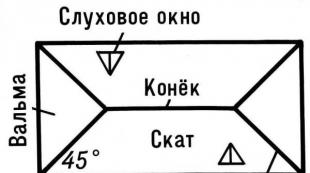
When constructing a veranda, the three-slope version is often used for an extension to the house, but such work is rather complicated. If there are some skills and knowledge of carpentry, then the home master will be quite capable of it.
Important! The roof should be thought out so that snow can easily roll off it, but do not forget about safety. After all, the accumulated snowdrift can fall on a person. That is why they try to make the slope more abruptly. In this case, the accumulation of snow will be small, and its removal is not dangerous.
If the home master is not sure that he knows how to make a roof on an extension to the house, and will be able to do it, it is better to seek help from specialists.
Instructions for installing an extension to the house with your own hands
Let's try to explain in general terms all the stages of building a veranda on a site adjacent to the house. We will discuss more detailed instructions for each type of building in the following reviews. Here's how to make an extension to the house:
| Illustration | Actions to take |
 | First of all, we start with the foundation. In our case, this is a well. A metal pipe is lowered into it, which is filled with concrete. The depth is about 1.7 m. |
 | The distance between the piles must be calculated. In our case, the weight of the veranda will be quite small, and therefore the distance can be made larger. |
 | We assemble a frame of metal beams on the piles, which will play the role of the first crown, which takes on the main load. |
 | Channels are welded together. In this case, the seam must be very strong. |
 | We also took care of communications. Draining water from the sink in the house was in this place. Well, let's deal with that. |
 | The holes in the channel are necessary for fastening the timber on which the entire structure will be built. |
 | We lay the beam around the perimeter and fasten it. You can start building the main supports and the roof. |
 | Having assembled the main frame from the timber, we reinforce it with transverse beams. In their role we have, 50 mm thick. |
 | We put the boards supporting the roof in pairs and tighten them together. |
 | It should look something like this. It should be noted that the boards supporting the roof also give strength to the frame. They are fixed to the main beams just with the help of tie rods. |
 | The roof can be covered with corrugated board. It is quite resistant to all weather conditions. |
 | The diagonal board plays a rather important role - it does not allow the building to heel due to the supporting beam of the frame. In our case, ordinary railings were made, but it is fashionable to sheathe or deglaze the building. |
 | Here, the diagonals are decorative, and therefore made of thinner boards. |
In general terms, the answer to the question of how to attach an extension to the house looks like this.
The cost of services of specialists in such construction
It is unlikely that it will be possible to build an extension to the house inexpensively when contacting specialists. But for general information, it does not hurt to consider the prices for such services using the example of various verandas:
| Types of verandas | Cost of work, rub. for 1m 2 |
| open annex | from 8 000 |
| Frame extension with insulation 50mm | from 9 000 |
| Frame extension with insulation 100mm | from 10 500 |
| Frame extension with insulation 150mm | from 11 500 |
| Extension from profiled timber 90x140mm | from 10 500 |
| Extension from profiled timber 140x140mm | from 12 500 |
Photos of verandas and terraces attached to the house: the work of professionals and not only
For those who still doubt that without special knowledge and skills, you can make a rather beautiful extension to the house - photo examples of verandas and terraces made by ordinary home craftsmen. Perhaps, the dear reader will find some solutions for his work. If not, then you can just enjoy. After all, it is really beautiful.
Surely many people liked the photos of the verandas attached to the house with their own hands.
Finally
It is unlikely that anyone can refuse an extra room attached to the house. But it’s one thing when this work was done by strangers, but it’s completely different if everything is done by one’s own hands. In addition, as it turned out, although it is difficult, it is quite doable. Is it worth it then to pay money to "someone else's uncle"? And it’s not a fact that the building will turn out to be of high quality and beautiful (there are enough hacks in our time). On the veranda, which was mentioned in the step-by-step instructions, it took about 10 days, along with painting. This means that for a maximum of 15-20 you can make it completely perfect. Specialists promise to do all the work in 30-60. Worth thinking...
We hope that the information presented by us today was useful to the reader. All questions (if you still have them) can be asked in the discussions for the article. Write, share your experience, because it can help someone.
And finally, we offer you to watch a short video on such construction:
YOU MAY ALSO BE INTERESTED IN:

