How to make a wooden swing gate for a garage with your own hands? Installation and drawings
There are many options gate for the garage and the materials from which they can be made: swing, lift-and-turn, roll, steel, plastic, wood. Let's stop on the last material and consider it separately.
wooden gate for the garage are good not only because it is very simple to make them yourself, but also because they will become a real decoration and “face” of your garage. We'll show you how to make these. light gate for the garage with your own hands.
In contact with
Swing garage doors: pros and cons
In addition to the appearance, swing wooden gates are distinguished by other advantages:
- The tree passes steam well, which will reduce the level of humidity inside the garage and have a positive effect on the condition of the car.
- Availability and low price - you can buy timber and boards at the nearest hardware store, but they do not cost that much.
- Ease of processing. This material does not require rare and very expensive tools, they can be found in any household, and most likely you know what to do with them.
Well, if you started construction from timber or logs, then installing the gate in will be the best option for you, since such gates will be best combined with the appearance of your garage, house and the entire site as a whole.
However, if you want to install wooden gates in your garage, remember to disadvantages:
- combustibility, this material burns very well when dry. And the garage is the place where the car is parked and a lot of fuel and oil is stored, so the issue of fire safety is especially acute. You can solve it using special fire retardant impregnations.
- The tree is affected bacteria, fungus and various insects, therefore, it is imperative to take care of protection from all these external factors with the help of all the same impregnations mentioned above.
- Any independent work, whether it is the construction of a garage or the manufacture of gates, requires careful planning and ability to work with materials and tools. If their skills are not available, then the help of an experienced friend and the willingness to actively learn the carpentry business are required. And in a situation where there is no time for this, it is better to turn to professionals and order their services.

Ready to roll up your sleeves and get down to business? If yes, then let's start with a choice materials.
Materials and tools
So, from what we will make wooden swing gates for the garage:
- Beam for the opening. Vertical racks should be dug into the ground by 1-1.5 meters, plus the height of the garage opening. As for the section, the beam will be strong enough 100x100 mm. The jumper between the uprights must also be made of timber and have a section of 50x100 mm.
- frame the gate should be strong enough, but not too heavy, to reduce the load on the hinges and posts. For its manufacture, you should take a bar with a section of 50x50 mm.
- Sheathing is made from boards 25 mm thick. As for the width, you can choose it yourself, but the optimal numbers are 10-20 cm.
- Gate hinges. Considering their mass, the load on them will be considerable, therefore it is better to purchase arrow-shaped hinges, as they are stronger and more reliable (and, besides, they will decorate your gate).
- Bituminous mastic.
- Cement.
- Impregnation for protection against fire, insects and fungi, antiseptic.
- wood stain or varnish.
- Mounting materials- dowels (wooden nails) and self-tapping screws. If the garage is not made of wood, then you will need long bolts and dowels
Tools, which are needed to create do-it-yourself swing gates to the garage, can be found in any private house, or ask neighbors and friends:
- electric jigsaw and hacksaw for wood;
- screwdriver, drill, mallet and hammer;
- chisel and planer;
- level, corner and tape measure;
- sandpaper or something similar;
- roller or brush for applying impregnation and varnish.
Before opening KOMPAS 3D(or other computer-aided design system) or sit down at a piece of paper, take a tape measure and measure the height and width of the opening.
 After that, you can start compiling plan. First, you need to bring vertical racks and a horizontal jumper from a bar on it.
Secondly, you should see how much space remains after their installation - between the opening (already taking into account the racks) and the gate leaves should be about 10 mm.
Why? Because when in contact with moisture, the tree tends to swell, and in order for the gate to be able to open and close at this moment, you need to give them some “margin”. The same applies to the distance between the two wings.
By the way, about them. The next stage of development drawing there will be a more detailed drawing of the wings, namely their frame and skin. The latter may have a protrusion beyond the edges of the frame by 10-30 cm, never have it. The frame itself must necessarily have diagonal beams, otherwise the gate may warp in a few years.
As for plating, then since we are dealing with a garage, then there should not be any gaps between the boards, they should be tightly fitted to each other both in the drawing and in reality. Carefully check all sizes so that later you do not waste time, effort and materials on correcting errors and shortcomings.
To production opening you can start at the moment when the plan is completely ready. Make sure that the site for installing the gate is as level as possible, as any violation of the level can cause the gate leaves to overlap each other.
Next, you need to dig supports from a bar 100x100 mm in the ground, preferably at 1-1.5 m. To protect the material, the part dug into the ground should be lubricated with bituminous mastic, it will not be superfluous to fill the holes with concrete.
Vertical racks and a horizontal jumper are attached to the walls of the garage with bolts. If the building is done wooden, then instead of them you need to use long self-tapping screws.
Do-it-yourself swing gates for a garage - drawings: 
Manufacturing
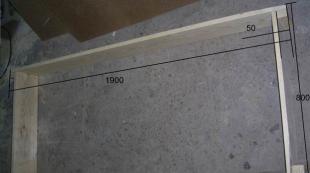
How to do wooden gate in the garage with your own hands? After drawing up a plan and preparing the opening, you can proceed to the main thing, that is, the manufacture of the gate itself. First, find a flat and clean area where you will collect frame And sheathing. Then carefully measure the timber for the frame, saw it into pieces of the desired size and process with a planer.
You can connect them together in two ways. First- drill blind holes in the beams with a drill and fasten them there with the help of dowels lubricated with epoxy glue. Second– connection with long self-tapping screws and mounting fittings in several places.
IMPORTANT: When processing the timber, pay special attention to the diagonal beams, since their junction points are the most important to perform. If you plan to use diagonals "criss-cross", then one of the beams must be cut into two parts and fastened to the rest of the frame separately.
Process the assembled timber structure antiseptic and other protective impregnations.
The next step is manufacturing plating. On the same level ground, measure and saw the boards that you purchased for this, and process them with a planer. Further, the boards can either be attached one by one to the frame with self-tapping screws, or assembled from them furniture board.
To do this, you need to make home-made clamps from a rope and a bar (or a piece of reinforcement), cover the joints of the sheathing elements with PVA glue and carefully fit them to each other using clamps and a mallet.
If a garage is important to you, then the space between the frame beams should be sheathed with mineral wool or other heat-insulating material, but at the same time, plank sheathing should also be made on the inside of the gate.

How to fix gates in a barn garage? The final stage in the manufacture of the gate is to attach the hinges and hang the leaves on the supports. At the same time, make sure that all structural elements are well fixed, that the self-tapping screws are reliable and that gate leaves close and open correctly. If you planned to coat the gate with a primer and then varnish, stain or paint, then this can be done at this stage.
That's all. As you can see, do wooden gate a garage in a log garage is not so difficult, and anyone can do it. And with careful planning, adherence to manufacturing technology and good material, such gates will stand for many years, delighting your eye.
In contact with
See inaccuracies, incomplete or incorrect information? Do you know how to make an article better?
Would you like to suggest photos for publication on a topic?
Please help us make the site better! Leave a message and your contacts in the comments - we will contact you and together we will make the publication better!


