How to make your own sliding gate
It is realistic to make sliding gates with your own hands, only for this you need to choose the right fittings, since it is these elements that set the direction of the movable section. Such a design will look organic when installing a picket fence, a fence made of corrugated board, brick, stone. One of its main advantages is saving space on the site, but the possibility of free movement of the gate section to the side should be provided.
Device features and diagram
The movable part of the structure has a given trajectory - along the fence. This helps to increase the useful space of the site, and the installation of sliding gates simplifies the operation of the gate. The main fastening elements: rollers, guides, traps, brackets (support brackets). Simplified drawing of this type of gate:
The number of fittings and their installation locations are determined according to the scheme:

In addition to the lower trap, an upper one can be provided. These elements perform different functions: the first of them takes on the main loads from the structure in the closed state, while the second one helps to reduce the windage of the gate.
The design is represented by several varieties:
- Automatic - controlled by a button;
- Mechanical analogue - opens and closes by applying physical force.
The circuit contains an electric drive that provides movement of the sash through cantilever blocks located on the base. Homemade sliding gates are easier to manufacture in a simpler version (mechanical design).
Preparation for work
The wicket and gates are included in the drawing at the design stage of the fence. Installation is carried out after the dimensions and materials of the main structural elements have been determined: sash, fence, fittings.
Watch video: Accessories and accessories
Choice of accessories
The set of fittings in such structures is almost always the same: a guide beam holding the movable section; 2 pcs. roller bearings connected to the guide and providing movement; roller bracket, which performs the function of insuring the structure from swinging; catchers (upper, lower) allow the gate leaf to dock without unnecessary difficulties.

Drive selection: A load of 250-300 W is sufficient for a movable leaf of less than 300 kg. For designs weighing up to 1,000 kg, a 600 W motor is suitable.
In addition, the design is equipped with additional elements: a gear rack and fasteners for it (if automation is provided); mechanical lock; mounting and adjustment support.

Check the thickness of the profile, many save on materials, offering a too thin and fragile option that is not durable.
When choosing fasteners, the length and weight of the movable sash are taken into account. The metal thickness of the guide beam is in the range from 3.5 to 5 mm. Accessories with plastic or rubber inserts will last less than fully metal counterparts. It is recommended to use galvanized metal parts.
If it is planned to make automatic structures, the electric drive is selected taking into account the width of the opening and the total weight of the movable sash in the assembled state: the greater the value of these parameters, the more powerful the automation should be.
Homemade sliding gates can be made from corrugated board, wood, using forged elements, plastic. The main thing that unites all these options is a rigid metal frame with a sufficiently large number of stiffeners to strengthen the structure. Even if the fence cloth is made in the form of a picket fence, it is allowed to use retractable structures sheathed with metal.
Sash dimensions
The length of the sash should be equal to the width of the opening + 1/2 of this value. The drive power and the quality of the fittings depend on the value of this parameter, since with an increase in the length of the structure, its weight increases, which means that the load becomes greater. For the frame, it is enough to use a profile pipe with dimensions: 40x40x2 mm.
It is not recommended to specially weight the sash, because if the gate is not automatic, it will be difficult to move the gate on its own. Before installation, a diagram is drawn up, where the location of all components will be determined, as well as a drawing with the main dimensions.
Job Guide
Do-it-yourself sliding gates are usually erected on a monolithic or screw foundation. In the first case, the reinforcement of the supports is mandatory; for this purpose, anchor bolts and threaded studs are used.

Calculate if there is enough side space on the right or left The distance should be at least 40% greater than the width of the gate, ideally 50%.
Foundation arrangement
The length of the base is determined based on the width of the gate opening. It is usually recommended to make the foundation no longer than half the width of the opening.

First you need to install pillars for the gate for support. The poles are steel pipes, as well as channel bars, concrete or brick poles.
In order to strengthen the base, a reinforced frame made of a channel and welded reinforcement is used. This element is usually installed close to the supports of the finished fence and fixed.
The depth of the reinforcement is up to 1.5 m, and the width of the pit is at least 40 cm. The foundation is the basis of the guide block, which takes on the load from the movable section.
Pillar installation
The distance between them must be sufficient for the movable structure to move freely. Support material: brick, metal, concrete casting. There are no restrictions on the choice of a suitable option.

We equip the foundation: a scheme of an embedded part with two supporting pillars.
How to fix the main elements?
The diagram will greatly simplify this task. Cantilever blocks (rollers) are installed on the power frame. On pillars or walls (the location is determined individually in each individual case), roller systems are fixed: catchers (upper, lower), roller bracket (supporting bracket).

If the gate will be automated, use a metal or plastic pipe with an inner diameter of at least 25 mm for this purpose.
The installation of the lower catcher is carried out by means of a guide block mounted on roller bearings. If the end roller (lower catcher) sags, adjust the cantilever units.
Movable section
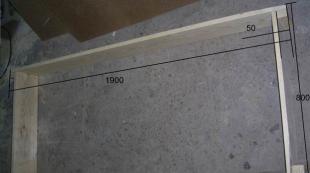
For its manufacture, a drawing with detailed dimensions is being prepared, which will simplify installation in the future. It was mentioned above that shaped pipes are used as the basis. At the same time, emphasis is placed on stiffeners, without them the structure will “lead” during installation and operation.

Moving frame design
Section sheathing
Lightweight materials are perfect for this purpose: profiled sheet, polycarbonate, thin sheet metal. Do-it-yourself sliding gates are best made in a minimum weight, which will simplify further operation. The dimensions of the sheathing material must correspond to the dimensions of the frame. Its fastening is carried out by bolting or welding, depending on the type of skin.
Installing the moving section
The installation of this design is carried out directly in the guide block, and fastening is carried out by means of fixing brackets.

Put the carts with rollers into the channel, spread them as much as possible, but do not forget that the end roller is 150 mm in size, so move the cart closest to the opening to the specified distance.
This stage is the final one and requires considerable physical effort to set the canvas in its place.

Please note that the knurling roller must roll on the trap (lower) and unload the gate.
Given the rather large weight of the metal frame of the gate, you need to prepare a reliable foundation, in which an embedded part must be present: a metal channel with welded reinforcement.

Gate leaf assembly
The movable sash is secured by roller bearings and fixing brackets. The device of a mechanical fence is simple in comparison with an automatic counterpart.
Video: Do-it-yourself gate assembly


