Construction of a drawing of an apron with a bib. Construction of a drawing of an apron without a bib, presentation for a technology lesson (grade 5) on the topic Construction of a drawing of an oval-shaped kitchen apron
The article contains patterns and photographs of aprons that you can sew with your own hands.
What material or fabric is better to sew from, sew a home apron, apron: tips
An apron is exactly that “mandatory” thing that every housewife should have. You can purchase it at any store or sew it yourself (this will testify not only to your skill, but can also be the most practical thing, since it will be made taking into account all your features).
It is customary to keep several aprons in the house, for example, for each family member or in the case when one apron gets dirty and another is needed “for backup.” An apron (or “apron”) is needed not only for working in the kitchen, but also in cases where you care for flowers in the garden, “digging” through old things, doing cleaning, or even repairing a car.
There are many styles of women's and men's aprons that perfectly protect clean clothes from dirt, dust, and wear. The apron can be attached to the waist or neck, covering the chest. If you have enough aprons, you can sew one to give as a gift to a loved one.
INTERESTING: You can not only feel comfortable in an apron, but also work comfortably, because it is equipped with many large and small pockets for storing handy things.
When creating an apron, remember that it should not only be good and comfortable, but also beautiful. For a self-made apron to turn out very “successful”, you should choose its style in advance, find patterns and purchase practical material.
The material for sewing an apron should be one that can “accept” all types of dirt and not stain the material of clean clothes. In addition, the apron gets dirty too quickly and very often, and then it is important that the material can withstand frequent washing well.
Which materials are best:
- Teflon fabric(capable of transmitting water, but not absorbing stains; the only drawback of this material is that it is relatively expensive).
- Linen(absorbs and transmits moisture well, can be easily washed many times).
- Cotton(light fabric that is practically not felt on the body, absorbs moisture well and washes well, withstands high water temperatures).
- Denim(a very unusual material, quite dense, but heavy and its weight is immediately felt on the body).
Other tips:
- It is best to choose colored fabric for an apron. On such a material, stains will not be as noticeable as on a plain and light material.
- Another option is to sew an apron from a dark fabric, for example, blue, black, purple.
- You can diversify such aprons with different colored inserts.


 Home apron in loft style made of denim or linen


How to make a pattern for an apron, apron 46, 48, large size?
In fact, an apron is a dimensionless accessory, as it has no fasteners or buttons. In cases where the apron “turns out to be small,” it should only be tied looser at the waist or the ribbon that holds the bib behind the neck should be lengthened.
How to make a pattern and sew an apron:
- In order to sew an apron correctly and accurately, you will need paper, fabric, scissors and thread (or a sewing machine).
- First, draw a pattern on paper (it consists of two large squares, three ribbons and two pockets).
- You can cut the pattern from paper such as whatman paper, wallpaper or a sheet of newspaper (large spread).
- After this, the pattern is applied to the fabric and the apron blank is cut out.
- Each edge is folded and stitched, after which pockets and ribbons are sewn on (on the neck and on both sides for tying at the back).
- The decorative finishing of each apron is done to your liking.
Pattern:


How to quickly and step by step sew a simple apron, an apron without a bib for the kitchen made of fabric: sewing technology and instructions for beginners
Sewing an apron without a bib for the kitchen is very simple. To do this, you should use one large piece and one ribbon to hold it and with which you can tie the apron at the waist. Such an apron must have several pockets for handy items, and any decorative finishing of the product, such as frills or ruffles, is done according to preference.
IMPORTANT: This apron is easy to sew from starched cotton fabric.
Adviсe:
- Make a pattern from a sheet of paper, place it on the fabric, and cut it out.
- The tape should be stitched on each side so that the fabric does not fray and the belt is tight and strong.
- You can sew the two elements of the apron by hand or using a sewing machine.
- Pockets are already sewn to the finished product, and best of all, using several lines, so that they can withstand even a heavy load.


How to properly sew the details of an apron?
Adviсe:
- It is best to sew the apron parts with a double stitch to ensure the product is durable.
- The apron skirt can be folded into a small fold and stitched so that it is fluffy and voluminous. This will add elegance to the product.
- The tape that holds the bib should be exactly the length that suits you, so take measurements in advance.
- The length of the belt on both sides is not so important, so you can make it with a margin. It is better to cut off a belt that is too long or tie it twice around the waist.
We sew aprons, simple aprons for the kitchen: ideas, styles and patterns
You can choose exactly “your” version of a home apron by studying all possible ideas and patterns. Choose exactly the style that you think will be beautiful and practical. The fabric for the apron can be taken from old scraps, remnants of clothing, or you can buy special material.
Apron patterns:


 Patterns of different types of aprons No. 7
We sew aprons, aprons for the kitchen ourselves with frills, ruffles: ideas, styles and patterns
Aprons made with frills, decorated with embroidery, lace, inserts from other materials, pockets and complemented by an unusual cut always look much more interesting and pleasant than a classic apron.
IMPORTANT: You can get ideas for sewing and get acquainted with patterns of “interesting” aprons in this article.
Options:


We sew aprons, aprons for the kitchen ourselves with bibs: ideas, styles and patterns
The advantages of such an apron:
- Fits well on the body
- You can sew additional pockets on the chest for storing things.
- Covers most of the body, preventing clean clothes from getting dirty.
IMPORTANT: You can find options for beautiful, simple and unusual aprons with bibs in the photographs and sketches below.
Options:

 Patterns and models of aprons No. 1


We sew stylish, beautiful aprons for the kitchen: ideas, styles
The more interesting the apron is, the more attention it deserves, the more pleasant it is to wear, the more such handmade work is worth. Check out the ideas and styles of unusual, very stylish kitchen aprons.


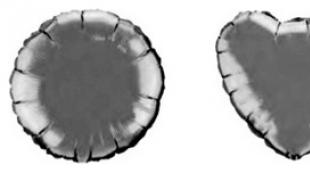
We sew aprons and aprons for the kitchen with our own hearts: ideas, styles and patterns
Aprons with a heart are a fashionable kitchen accessory that women love so much. The secret of the apron is that the bib in this case is cut out in advance with a heart and trimmed with frills.
Photo and pattern:

 Apron with heart
 We sew aprons and aprons for the kitchen in large sizes: ideas, styles and patterns
To sew a large apron, you will need the appropriate pattern.

We sew aprons and kitchen aprons for men: ideas, styles and patterns.
Even men need aprons in the kitchen. They can be in the form of an apron or solid, covering the chest.
Patterns and photos:


We sew aprons and aprons for the kitchen ourselves without a pattern: technology, ideas, styles
Even without a pattern, you can quickly make a practical apron for the kitchen or gardening with your own hands.
Options:


The best models and styles of kitchen aprons, aprons for the kitchen with your own hands: photos
Each needlewoman has her own view of things, creativity and work, and therefore there are many original aprons, hand-sewn using unusual patterns.
Video: “How to sew an apron with your own hands?”


Description of the presentation by individual slides:
1 slide
Slide description:
Designing an apron. Design is the development of drawings of product parts.
2 slide

Slide description:
Lesson topic: Objectives: 1. To introduce the construction and design of drawings of garments (letter designations of points, segments) 2. To familiarize with the methods of design calculation, the rules and sequence of drawing an apron 3. To consolidate the ability to perform the simplest rectangular developments of patterns of garments. 4. Foster a work culture, accuracy in performing work, independence when performing calculations and drawing drawings. “Construction of a drawing of the base of the apron in M 1: 4, calculation of the structure using formulas.”
3 slide

Slide description:
Repetition of previously studied material 1. What lines are called horizontal and vertical? 2. How to construct a right angle? 3. How to plot segments of different sizes on a straight line? 4. Remember why you drew a vertical line when you drew a vase, glass, jug? Most objects have a symmetrical shape. The human figure is also symmetrical (if you mentally divide it in half lengthwise, then the right half will be equal to the left), so the pattern is made for half the figure.
4 slide

Slide description:
A drawing is a graphic representation of an object on paper in full size, reduced or enlarged. The easiest way is to depict flat figures in the drawing. They have two dimensions: length and width. The intersection points of vertical and horizontal lines are marked with letters: Top - B, waist - T, bottom - H. Each segment in the drawing is marked with two letters: Top line - BB1, waist line - TT1, bottom line - HH1. If the size of an object fits on a sheet of notebook, then it is drawn in full size; if it is larger (the apron), it is reduced by a certain number of times, that is, it is depicted to scale. The scale is written as the ratio of two numbers: 1:1 - natural size; 1:4 - reduction by 4 times; 2:1 – 2x magnification
5 slide

Slide description:
To complete the drawing of the apron, we will need measurements, a 1:4 scale ruler, and drawing supplies. Measurements that are taken in full and recorded in half size. Conventional designation of measurements Full name of measurements Rules for taking measurements St Half waist circumference Horizontally at the narrowest point in the waist area Sa Half hip circumference We draw a centimeter tape parallel to the lace at the waist, along the most protruding points of the buttocks, taking into account the protrusion of the abdomen
6 slide

Slide description:
7 slide

Slide description:
Measurements that are both taken and recorded. Symbol of measurements Full name of measurements Rules for taking measurements Di Product length From the waist line down to the desired length D Length of the bib Along the mid-front line from the waist line up to the desired chest length
8 slide

Slide description:
Overalls for culinary work consist of an apron and a scarf. The apron has several parts: bib, belt, straps, bottom, pockets. An apron made of cotton fabric of a straight shape with soft folds from the upper cut of the lower part of the apron. Main detail with bib and patch pockets. The bib is connected to the bottom of the apron using a belt with knotted ends. The bib is made with straps. The bottom and edges of the apron are finished with a hem seam with closed edges.
Slide 9

Slide description:
The left and right parts of the product are symmetrical, i.e. They are identical, so we can construct the drawing only for one half - the right one. Using the symmetry of the product in width, girth measurements, namely, From and About, we will use in half size, i.e. St; Sat. And measurements: Dn; We will use di in full, since according to these parameters the product is not symmetrical.
10 slide

Slide description:
You and I have already learned how to take and write down measurements for constructing an apron drawing. Today we will build a pattern for an apron drawing using standard measurements. Measurements: 1. St = 31cm. 2. Sat = 40cm. 3. Dn = 18 cm. 4. Di = 40 cm. Using the following increase: Pb = 6cm.
11 slide

Slide description:
Constructing a drawing of an apron We build a right angle at point B 1. We retreat from the top of the edge of the sheet 3 cm. 2. We retreat 2 cm from the edge of the sheet on the right. We put point B 3cm. 2 cm B Construction of the grid VN - apron length = DN + DI = 18 + 40 = 58 cm. N VT - bib length = DN = 18 cm. T H1 BB1 - apron width = Sat: 2 + 6 = 40: 2 + 6 = 26 cm. B1 We complete the rectangle, draw a horizontal waist line T1 Bottom line Waist line Top line
In the modern world, the ability to independently design and model products, it would seem, is no longer required: shops and boutiques are filled with clothes of all kinds of shapes and colors. However, isn’t it nice to choose the fabric yourself, take measurements, make a pattern and sew a unique product that no one else in the world has?
Perhaps the simplest product, which even a novice seamstress can create a pattern for, is an apron. Many people prefer to have one or more aprons in the kitchen (for each family member) so as not to get their clothes dirty while preparing dinner. An apron is also an element of many national costumes. Having built a basic drawing of a pattern, you can model it as much as you like in order to achieve one or another result.
Types and features
There are three main apron models:
- one-piece, which is made from a single piece of fabric,
- with a stitched bib,
- without a bib (aka an apron).
An apron of any cut may or may not have pockets. Ties made in the form of ribbons, ribbons or straps can be attached behind the neck, belt or shoulders. Aprons of various silhouettes can be differ functionally.
There are several types of aprons according to their purpose:

Nowadays, for DIY sewing at home, a kitchen apron is most often chosen. Created with your own hands, this item of clothing adds coziness to your home, even if it is not used for its intended purpose, but protrudes in the form of an interior item.
Creating a pattern
Necessary equipment at the workplace
Such a serious matter as tailoring, even if it’s just making an apron, needs to be approached wisely. The first thing you need to do is check whether you have everything you need at home. tools and accessories for comfortable work:

When all the tools are ready, you can start taking measurements.
Most garments are symmetrical and an apron is no exception. That's why the pattern is built only for one half of the product and almost all measurements, with the exception of lengths, are recorded in half size - this is called half-girth.
To make an apron pattern with a bib Four measurements are required: waist and hip circumferences, length of the product and chest. Accordingly, only the first three measurements are needed to sew an apron.

Measurements Don't remove it yourself, it is better to entrust this matter to another person. All measurements must be taken from the right side.
Construction of a drawing
 We are building a basic drawing of an apron with a bib, a belt and two straps that tie at the back of the neck. The width of the bib is fixed - 20 cm, the width of the belt and straps - 5 cm, the length of the straps - 40 cm.
Step 1. Constructing the main vertical line. On a sheet of graph paper, set aside point T and draw the LSF vertically through it (the line of the middle of the apron), mark it with a dotted line as a fold line.
Step 2. Constructing the main horizontal lines. Through point T, draw a waist line perpendicular to the LSF. On the LSF above point T, set aside a number of centimeters equal to Dg, and mark point G, from which to draw a chest line. On the LSF below point T, set aside a number of centimeters equal to Di, and mark point H, from which draw a bottom line. All lines in the drawing must be parallel. To designate points placed on the right on horizontal lines, the corresponding letter with a digital index is used (length of the waist line - T2, T3, and so on).
 Step 3: Build the Bib. From point T, measure 10 cm - half the width of the part - and put point T2, from which draw a line parallel to the LSF until it intersects with the chest line. At the intersection, mark point G2.
Step 4. Construction of the main part. Determine the width of the lower part of the product using the formula Sat: 2 + 10 cm. (An additional 10 cm allows you to increase the area covered by the apron. If desired, this number can be either reduced or increased.) Measure the resulting number of centimeters from point T and put point T3, from which to draw a vertical line parallel to the LSF until it intersects with the bottom line. Mark point H3.
Step 5. Construction of the belt. Determine the length of the part using the formula St + 30 cm - this is enough for comfortable tying. Measure the resulting number of centimeters on the waist line from point T and place point T4, from which measure up 5 cm and place point P2. From point T, also measure 5 cm up and place point P. Connect the extreme points of the belt P and P2.
 Step 6. Construction of the straps. Draw the strap in the form of a rectangle with sides of 40 and 10 cm, where 10 cm is the width of the part in the cut. Draw a fold line in the middle.
Step 7. The drawing is ready. All that remains is to indicate the direction of the grain thread (it should be parallel to the edge of the fabric), sign the names of the parts and their quantity:
- main part of the apron (1 pc.),
- bib (2 pcs.),
- belt (2 pcs.),
- strap (2 pcs.).
When transferring a pattern to fabric, you must remember the seam allowances, which should be at least one centimeter, depending on the fabric. Some fabrics (such as cotton) shrink so should be taken care of before transferring the pattern. wash and iron b.
Conclusion
 The resulting apron pattern can be modeled as you please: change the length, width and shape of the product elements (for example, round the corners of the bottom), add pockets and other details. It will not be difficult to make an apron pattern using the proposed algorithm, skipping some steps. Like basic culinary recipes, basic patterns are interesting because they provide enormous scope for imagination.
Like any thing, before you sew an apron, you need to cut it out. And in order to cut, you need to do construction of an apron drawing.
The simplest cut apron is a one-piece one. In this lesson we will make two versions of patterns:
- pattern of an apron with a cut-off bib;
- pattern of a one-piece apron.
For an experienced dressmaker, of course, any version of the apron will not cause any difficulty in cutting it out directly onto the fabric. But for this it is necessary that there is an image of the object being created in the mind. A beginner doesn’t have one, so I suggest making a pattern on paper first. At the same time, an image of the apron pattern will be formed, which will subsequently help you cut it directly onto the fabric.

To make an apron pattern or cut it out on fabric, you need to take several measurements. The procedure for taking measurements is classic.
- Tie a belt around your waist and determine the narrowest part of your body.
- Measure your waist circumference to determine the length of the belt. Write down half the measurement - Art. This measure need not be divided, but written down in full form - From.
- Measure the widest part of the body - the circumference of the hips. It should be noted here that the widest part of the body is not always the hips. It may be that the chest measurement will be larger than the hip measurement. We need exactly the hips: the measuring tape passes through the protruding points of the buttocks parallel to the floor, taking into account the protrusion of the abdomen. Do not tuck the tape under your stomach or lift it up. We write down half the measurements - Sat.
- The belt at the waist is the zero mark. Down from the waist to the desired length - the length of the bottom of the apron - Day.h. The measurement is recorded in full.
- Up from the waist to the desired height - measure the length of the bib - Day. The measurement is recorded in full.
- Strap length – Dbr: from the top line of the bib on one side through the neck to the desired height of the bib on the other side. Take this measurement immediately after measuring Day.
The strap, like any other piece of clothing, must correspond to the size of the product and be adjusted to the figure. Both a long strap and a short one not only violates the aesthetics of the product, but also causes discomfort when using the apron.
- Bib width: the width measurement must be taken at the intended upper part of the bib and written down - Shn. at half size.
We write down all the measurements in a column (the measurements used for the example are in parentheses):
Take your measurements and write them down in centimeters.
Beginners also have no experience in handling fabric and scissors on a first-name basis, or practicing economical layout, so I always advise that if you have a pattern, then use it, since it makes it easier to lay out fabric layouts, as you will see for yourself.
It is also more convenient to use a pattern if the fabric is coupon and you need to choose the best placement of the cut according to the pattern.
Option 1.
Construction of a drawing of an apron with a bib

An apron with a cut-off bib is more difficult to sew, but it has its advantages - it fits better on the figure. But when constructing a drawing of an apron, it is the basis for a one-piece apron. Therefore, we begin to build the pattern with this option.
- Determine the center line of the pattern, corresponding to the fold line on the fabric. Construct a right angle with vertex B.
- Lay down the length of the bib Dn - point T, draw a horizontal line.
- From T downwards, set aside the length of the lower part of the apron. – point H, and draw a horizontal line.
- Along line T, plot the width of the lower part of the apron using the formula:
(Sat.: 2) +8 = ... and put point T 1.
Lower the line down and build a rectangle - the lower part of the apron is ready.
5. Along line B horizontally, set aside the width of the bib Shn. (measurement is written in half size) – place point A.
6. Place the measurement Shn horizontally along the T line. + 1.5 cm – point B.
7. Connect A and B. We get a bib - a figure with VABT points
8. Pocket construction. From T down, set aside a measurement of 8-9 cm, for children - 7 cm = point K. From K horizontally (parallel to the waist line) set aside K1 = 8 - 9 cm (for children 7 cm).
From point K1, build a pocket: horizontally to the right - pocket width for children - 15 cm, for adults - 17 cm (according to hand size).
From point K1 downwards, set aside the length of the pocket: for children - 16 cm. For adults - 19 cm.
Construct a rectangle drawing of a pocket.
When cutting, the pocket is cut out separately, but on the apron you need to mark the place where the pocket will be sewn, so the pocket is marked on the apron. However, the location of the pocket can be determined during fitting, and the pocket can be drawn separately.
9. The strap, belt and scarf are cut out directly on the fabric, although the school curriculum requires making patterns of these parts on paper.
a) The length of the strap is equal to the measurement plus 6 cm for allowance, the width of the strap is 5 - 6 cm.
b) The length of the belt is: (St + 30 cm for ties) * 2 =
or: From + 60 cm for ties. You need to add 2 cm for processing the ends of the belt and 2 cm for each stitching seam if the belt is made of several parts.
The optimal belt width is 7 cm.
d) I don’t recommend making a scarf on paper. However, to draw a drawing on paper or a pattern on fabric, you need to measure the front part of the head, add 30-40 cm to the ends for tying a scarf. This segment is equal to the hypotenuse of an isosceles triangle (approximately 105-110 cm). Lay the piece along the bias thread so that you get an isosceles triangle: with sides 65 -75 cm, depending on the size (the numbers are indicated with seam allowances). Draw a scarf and cut it off.
Option 2.
One-piece apron.
We perform the same actions as when building an apron with a bib:
- Construct a right angle with its vertex at point B.
- From (.)B, put two measurements in a row down the length of the pattern: Day. - T;
Day hours – N.
3. Along line B, horizontally set aside the width of the bib Shn - point A.
4. Along the T line horizontally - the width of the lower part: calculate using the formula: (Sb: 2) + 8 = point T 1
Lower the perpendicular down to line H, construct a rectangle.
5. From T along the width of the pattern, set aside Shn. : 2 + 1.5 cm = B
Connect the top and bottom points of the bib: A and B.
6. Form the side cut of the apron from the top of the bib to the waist line with a smooth concave line.
The corners of the bottom of the apron can also be smoothly rounded. The radius of curvature is determined experimentally depending on the size of the apron. The smoother the corners are rounded, the easier it will be to process them, both with a hem seam with a closed cut and with an edge seam.
In addition, if you choose to process the cuts entirely with edging tape, then you will need to slightly round the upper corners of the bib.
Apron without bib
In the past, an apron with a cut-off bib would have been suitable for a technology lesson. "How to sew an apron, grade 5. Federal State Educational Standard". But the program has been changed, simplified, and this lesson will be more difficult to understand than provided for in the new program, although it includes elements of an apron for the fifth grade. You only need to take the lower part of the apron and the belt. The same applies to those who needed apron without bib.
Today we completed drawing of an apron, we looked at two options for constructing patterns: a one-piece apron and with a cut-off bib, we learned about the advantages of cutting on fabric and using a pattern.
Which pattern option is more interesting for you, will you cut directly onto the fabric or will you create an apron pattern? Share your experience, your successes - everyone will be interested.
I look forward to your comments and questions. If the article was useful, share it with friends, like, subscribe to the news and receive the book as a gift "Sewing machine for home use."
With love, Olga Zlobina
MBOU SOMSH No. 44
Compiled by: Lagoida Lyubov Mikhailovna, technology teacher
Vladikavkaz, 2015

Target:
- Construct a drawing of an apron without a bib.
Tasks:
- Teach students to build a drawing of an apron without a bib.
- Develop the skill of drawing drawing lines, motor skills, and eye.
- Cultivate accuracy and perseverance.

Apron details
Bottom of apron

To build a drawing
apron basics
take measurements:
1-waist circumference;
2-hip circumference;
3-product length.

Measurements for drawing a drawing of an apron without a bib
The drawing is made on the right half of the figure, so girth measurements are recorded in half size. Length measurements are recorded in full.
№ p/p
Name of measurements
Half waist
Designation of measurements
Purpose of measurements
Half hip circumference
Length of the product
Determining the length of the belt
Determining the width of the product
Determining product length

Construction of a drawing of an apron without a bib
- Construct a right angle with vertex at a point T.

2. From point T, measure TN- product length

3. From point T to the right side, measure
TT 1 – apron width (Sat:2 + 6)
T 1

4. Construct a rectangle with TT points 1 N 1 N .
T 1
N 1

5. Determine the location of the pocket. From point T, put down 6cm-TK
(constant value)
T 1
N 1

6. Determine the length of the pocket.
From point K downwards, set aside 14cm and place point K 1 (constant value)
T 1
TO 1
N 1

7. Determine the width of the pocket. From points K and K 1 set aside 10cm to the right, draw straight lines and put points K 2 and K 3 . Connect the dots K 2 and K 3 straight line.
T 1
TO 2
TO 1
TO 3
N 1

8. Outline the outline of the apron as a solid main one
line.
T 1
T 1
TO 2
TO 1
TO 3
N 1

9. Construction of the belt.
Construct a right angle with its vertex at point P.

10. From point P, set down the width of the belt equal to 9 cm. Put point P 1
(constant value).
P 1

11. From point P 1 to the right, set aside the length of the belt (St x 2 + 30cm) and build a rectangle PP 1 P 2 P 3 .
P 2
P 1
P 3