DIY massage track for children. DIY massage mat for a child. Why is it needed?
Taking the first steps, the child learns to walk. Then, when the basics of walking are fixed in him, and he boldly begins to run, the question arises about the correct gait and the formation of the foot. Today, almost half of children have problems with their legs. Clubfoot, flat feet and other serious foot diseases can cause serious problems for the baby's health in the future. Therefore, at the first signs and alarm bells, parents need to consult an orthopedist.
To avoid flat feet, it is very important to carry out its prevention in a timely and regular manner. A massage mat created with your own hands can turn boring exercises into an exciting game. My daughter herself asks to unroll the rug for her so that she can walk on it.
Let's start the master class.
To create a developmental mat you need:
1) Dense narrow and long fabric. Old carpet runners are ideal. I used a car cover cut into stripes as a basis.
2) Tubes,
3) lids from plastic bottles and baby food jars,
4) old washcloths,
5) Christmas beads,
7) fabric from which the bag is sewn and the sponge is filled with cereal,
8) Footprints (I cut them out of white fabric)
9) A box from a box of chocolates.

The list can be extended depending on what you find in the house. I didn’t buy anything special, but just took what was on the farm.
1) First, we prepare all the covers: using a nail and a hammer, we press 2 holes in each cover so that they can be sewn to the base.

2) Then you need to sew or find a small bag to put the cereal into. I chose chickpeas (chickpeas), they are large and dense, ideally massaging the feet.

3) The next step is cutting out a trace from a simple cotton fabric. I cut out 4 leg marks and think that's enough. Of course, you can cut out more if the path is longer than mine.
4) Now you can begin to gradually sew all the prepared elements to the track. My first item is a shower washcloth. Next is a bag of chickpeas, after that baby food lids, then tubes (each tube had to be sewn separately in three places for strength, because the daughter immediately tried to grab them).


After the tubes, I sewed the sponges with the hard side up, and then the mat.

The next step is plastic bottle caps. I searched and collected them for a long time, but it was worth it. They are an excellent massager. The more there are, the better. After the lids follow the same traces of fabric.


The path is completed with beads, a candy container on the back and an old washcloth.

This is the massage mat I got.

My daughter loves it. It unfolds and collapses easily and takes up little space.

Every parent can make such a rug for their child. There are a lot of benefits from it, and the costs are simply minimal. Of course, you will have to spend a little time, but the result is worth it. Good luck in your endeavors!
The famous doctor Komarovsky, like many other specialists, advises children to walk barefoot more often, this will save them from flat feet, club feet and other orthopedic problems. But if you don’t have a dacha, and you can’t let your baby out into the courtyard of an apartment building barefoot, then there is a solution - a massage mat. Have you seen how much they cost in children's stores? We do, and that’s why we decided to create one ourselves, especially since it can be done from improvised means.
So let's get started...
What do we need?
- For the base, a thick fabric is useful, it can be denim or linen, folded in several layers. You can also use a piece of carpet or a polyurethane rug for the beach or sports activities for the base.
- Secondly, cotton wool or padding polyester are needed if very dense fabric is not found for the base.
- Filling – buttons, pebbles, corks, what else? We'll tell you further.
- Tools for needlework, ribbons, clasps, bright appliques for decoration, and other decorative elements.
10 ideas for creating a massage mat
Barefoot on the sand
How nice it is to run barefoot on the sand, and how beneficial it is for kids! Our rug can imitate sand, and walking on it will also be pleasant.
- Sew a fabric bag from thick material, decorate it with appliqués or marine-themed designs.
- Fill the bag with rice, millet or buckwheat, leaving some free space inside.
- Sew up the bag, making sure that the cereal does not fall out of the seams. The number of bags depends on the size of the future rug; you can sew them together using ribbons or pieces of fabric.
Walking on such a rug will relax your baby's legs and calm him down.
Rails-rails, sleepers-sleepers
Boys will especially appreciate this rug, because they love to play with trains and railroads. “Rails”, which you can create yourself, will become not only a tool for massage, but also a favorite object for games.
- In addition to the above, old pencils, markers and even cocktail straws will come in handy.
- To begin, sew several fabric squares; on each square, at an equal distance from each other, you need to sew 10 or more small elastic bands on top of each other. These can be silicone rubber bands or regular ones for hair.
- Sew the squares together to make one big “railroad”, insert pencils between the rubber bands, the rails are ready!
Watch (free at)
Please note: the distance from rubber band to rubber band should be less than the length of the pencil by about one and a half to two centimeters.
Walking on “rails” helps a lot with flat feet.

Rope maze
Children love “confusing” objects so much, let them play in a real labyrinth, which will also serve as a massage mat.
- The base for such a rug should be very dense, for example, a piece of old carpet.
- You will need a very thick rope, preferably the rope type. Tie a lot of knots on it.
- Create a labyrinth from it on the base; you can connect it to the carpet using strong glue, or simply sew it on with a special curved needle.
Teach your child to guide toys through the labyrinth, and also play with him yourself, complicate the task by placing dangerous animals in the nooks and crannies of the labyrinth. So that the whole family can play, make it the size of the entire room. You can ask your husband for help!
Gift from Moidodyr
For the smallest feet you can create a “gentle” rug.
You can scatter different sponges, washcloths, and foam cloths onto the base. Everything that any housewife can find.
Your gift will become a place of favorite games for your baby and his little guests!
At the end of the article, we have prepared a checklist “How to increase the immunity of a child 1-3 years old.” Download it and find out what to feed and what the right thing for a mother to do when her baby has a cold!

Pebbles from the seashore
If you are not the most talented seamstress, and you don’t have much time, this is not a reason to run to the store for a purchased orthopedic rug. Most often they imitate grass or pebbles, but walking on natural pebbles is much more pleasant, right?
- You will need a very dense base, but carpet will not work, as the pile absorbs the glue and the pebbles will not stick well. The ideal option is a rubber sports mat.
- Just glue a lot of pebbles of different sizes to it and the gift for your baby is ready!
Attention: stones can only be used that are flat, smooth and completely safe.
Watch (free at)
 Lids for baby
Do you have a lot of baby food caps, milk bottles, and soft drinks? Don't rush to throw them away!
- To a dense base, preferably polyurethane, glue lids of different diameters in different sequences. You can sew them.
- For older children, the lids can be turned upside down with the sharp edges facing up; for babies, the lids can be turned upside down.
Such a rug can rightfully be called orthopedic; walking on it is excellent.
Buttons and beads
For the youngest children who are just starting to walk independently, massage is especially useful, but it must be gentle. Therefore, for filling we will use the smallest objects: buttons large and small, beads, zippers, everything, that is, in the arsenal of any needlewoman.
Attention! Small parts should be sewn well to the surface so that the baby cannot tear them off and swallow them. Let him play with them only under your supervision!

Old curlers will help
Every mother probably has old curlers at home; sew them onto thick fabric and you will get an excellent foot massager.
Combine curlers:
- Soft from foam rubber.
- Hard and smooth plastic.
- Hollow inside and with a ribbed surface.
- Metal.
Walking on such a mat is good for relieving fatigue from your legs.
patchwork quilt
- You can use an old patchwork quilt as the basis for this option.
- Stock up on fabrics of different textures: thick denim, soft fleece, ribbed corduroy.
- Cut squares from these fabrics equal to the squares of the quilt and sew them on.
- Such a gift is a great place for games even for those children who cannot walk yet.
Lifesavers
For older children, you can create a rug from different wooden sticks. These can be caramel or ice cream sticks, Japanese food sticks, and even small cubes. Glue them well to the base, make sure that the surface is smooth and does not leave splinters, or better yet, coat all wooden elements with varnish.
Finally, let’s share one more idea: use all of the above methods to create individual squares, let your carpet have a railway, and shreds, and curlers, and sponges, the baby will be delighted!
What else can you use to create an orthopedic mat? Or is store-bought better?
Download the checklist "How to increase the immunity of a child 1-3 years old"
Have you already tried all the pharmacy miracle remedies that promise to turn your baby from a frequently ill patient into a healthy, strong one, but to no avail? Download the checklist and find out what the right thing to do for your mother is when she has the next “snot” and cold!
Ours is finally ready developmental track, or else, as they say, massage Mat.
The idea and desire were born a few months ago, and now, from an idea on paper and pieces of various materials, this beautiful thing was born (for us, needlewomen :)) developmental benefit for children. Many things influenced the timing of the appearance of the rug, but this is no longer important :)
In the picture you see the results of our work :) Why do I say ours, since the idea of the rug and the design of the squares was mine, I also selected the materials, and my son’s grandmother and aunt realized my ideas creatively and creatively. Many thanks to them for this! Now this miracle is in our room, and my little son is studying it in detail and testing its strength :)
So, let's talk about the rug in more detail.
Developmental track, or do-it-yourself massage mat
Mat as a whole
- The rug can be used even by the smallest children, I would put the age marking 0+.
- The rug consists of 15 squares, each of which represents a different idea.
The basis is an ordinary, not very dense path. The squares were sewn separately and then sewn onto the track. After all the squares were sewn, another thick fabric was sewn on the back of the runner to hide any errors.
- Rug and developmental and massage. In addition to the picture that you see externally in the photo, inside some squares there are bags of cereals, which creates an additional massage and developmental effect. You can use any grains, after frying them in a hot frying pan. I used: buckwheat, millet, rice, a mixture of cereals, wheat and beans.
- The mat can be used both independently and in a play situation.
- Ideally, you should use fabrics that you have at home. Since I moved in with my husband, I had a small selection of fabrics. As a way out, in addition to what I had, I bought pieces of fabric from the atelier. I bought both waste pieces and pieces cut from rolls. I also used: washcloths, ribbons, buttons, pencils, clothespins, clothesline, special stickers on fabric.
The squares with cereals are made in the form of zippered pockets, and inside there are cotton bags filled with bulk material. This is very convenient, since, if desired, the cereals can be changed. And also take it out when washing the rug. Although I’m not thinking about this stage yet :)
- It is very convenient to use a sewing machine. Our sewing machine broke down at home. Therefore, I had to sew a lot by hand and carry it to the studio. And this increases the time it takes to create a rug and its cost.
You need to sew on the parts very securely and do not spare the threads, since the child will definitely test the strength of the track.
- Fill the square with your memories and associations, and also rely on the interests of your baby. While sewing, think only about good things.
1. Square “At sea”
 The picture that I painted in my head at the beginning of creating the rug: “Little feet running on the sand, the sound of the sea, at the bottom of which the life of sea inhabitants is seething…”. In the photo you see how we managed to realize my fantasy.
Sea, childhood...such pleasant memories!
Inside the square is a bag of wheat.
2. Square “Rails”

When I came up with this square, I thought about the railway. I really like to travel by train. And when she moved to her husband, she settled meters from the railway. And she could enjoy the sounds of passing trains endlessly. Rails, rails... and green grass all around
Pencils are inserted into holes made from rubber bands. Pencils are also easy to remove.
What I realized after I handed the mat to my son is that such sharp pencils are not suitable. Take blunt pencils on both sides or some non-sharp sticks.
My son really enjoys playing with this square.
Now I understand that for a child after a year, interactive squares will be even more interesting when something opens/closes, fastens/unfastens, takes out/puts in, etc. Maybe somehow we’ll accomplish another feat: an interactive rug :)
Subscribe to site articles in the form below and follow our crafts!
3. Square “Football Bear”

On top of the square there is a special sticker that is glued with an iron. What I got was not very high quality, it floated from the heat. Inside the square is a bag of cereal.
4. Square “Labyrinths”

The “labyrinths” are made from a clothesline with knots tied on it.
5. Square “Sunflower”

We got such a cute, smiling child sunflower. And inside there is a bag of cereal.
I immediately remember my childhood with my grandmother. There are always a lot of sunflowers growing in her garden.
I remember that my sister and I always didn’t have the patience to wait for the sunflowers to ripen, so we ate them still raw. The sparrows also “didn’t graze their hind ones.” No scarecrows frightened them on their way to the delicacy - sunflower seeds...
Childhood is a wonderful time!
6. Square “Granny’s House”

A house, smoke buttons, a fence with clothespins... And again I remember my childhood with my grandmother :) It was a good and kind childhood, not without problems, of course, but only the good things are remembered :)
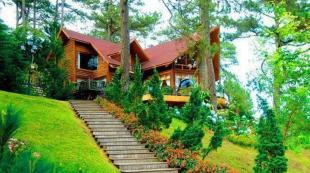
7. Square “Houses by the Lake”

There are washcloth houses and a lake made of washcloths, and white lilies float on the water. They also wanted to put swans there, but somehow things didn’t work out with them :)
8-9. Weather square

Here, on two squares, weather phenomena and celestial bodies settled:
- day: the sun is smiling, clouds, a rainbow of satin ribbons;
— evening, sunset: it’s snowing with rain;
- night: month and stars.
10. Square “Washcloths”

This square shows different washcloths for a good massage effect, and you can also use them to study geometric shapes, although geometric shapes will be presented more clearly later.
My son loves a variety of rags, washcloths, and now actively wipes everything: the floor, dust, table... You can see this in the article on
11. Square “Fruit trees”

Pears and apples grew on this square. Who doesn't love them?! My son likes apples more, what about your kids? :)
Inside is a bag of cereals.
12. Square “Pocket”

Oh, these locks... How could we live without them?! My son loves to play with lightning. That's why a pocket from old jeans now lives on massage mat.
Inside is a bag of cereals.
13. Square “Geometric Shapes”

Here they are, the geometric figures that I wrote about above. We will study them by playing DIY developmental (massage) mat.
14. Square “Cars”

Like most boys, we love cars. And also buttons. We placed all this love on square 14 :). This is my son’s favorite square, after the “Rails” square.
Inside is a bag of cereals. In principle, cereals could not have been added here, but since we had permutations of squares, we made a pocket for cereals here by accident.
15. Square “Bathroom”

This is the last square on our path: a soft bath and a curtain that rises.
When I was thinking about this square, I remembered how my son loves to play in the bathtub with water, loves to open and close the tap...
I imagined this square a little differently, but my son’s aunt Christina implemented it in such an interesting way! Thanks her! And thanks again to grandma. They have “golden” hands!
Like this developmental track or massage mat we succeeded with your own hands.
Be happy!
Beautiful and useful DIY crafts to you!
(Visited 5,059 time, 1 visit today)
Is everyone teaching you how to live?! Knowledge is power! Read us! Be smart, confident and happy!
Published in,Content
Human feet experience enormous loads every day. A considerable share of it is received by the foot, on which there are many nerve endings. They are able to influence the functioning of internal organs. A useful and health-improving procedure for a person would be a foot massage, which you can do yourself every day.
What is a massage mat
Already 2000 years ago, Chinese medicine used foot massage as a healing procedure. It was accessible only to the upper class. Now everyone can afford it: all you need is a mat for your feet. It is a small piece of material (fabric or carpet) with a non-uniform coating structure. The irregularities can be rubber bumps, pebbles or other similar small elements. Thanks to them, when you use a foot massage mat, reflexive stimulation of many points on the foot occurs.
According to reviews of people who use an orthopedic massage mat after work or long walks, their health improves, insomnia goes away, leg swelling subsides, and pain goes away. When using a massager you can:
- solve problems of flat feet;
- establish proper functioning of internal organs;
- provide a general healing effect;
- rejuvenate the skin of the sole of the foot with effective peeling;
- prevent the formation of corns and calluses.
Species and types
There are foot massagers that differ in functionality and appearance. Rugs can also be divided into options that simulate different surfaces on which you will walk. The most popular types of structure:
- pebbles;
- bumps or other similar irregularities;
- grass;
- coarse sea sand.
These are common versions of those rugs that are sold, but some skilled people create such things with their own hands. Plastic covers, ordinary smooth-shaped stones, rubber rollers and washcloths (if a child needs massage), and buttons are used as irregularities for massaging points on the foot. Sometimes such products are placed at the bottom of the bathtub to massage the feet while showering.
How to use the mat

Once a person has chosen the appropriate mat option, they should figure out how to use the massager. Conventionally, the foot can be divided into several segments, each with points responsible for the functioning of the internal organs. The relief of the massage mat for the feet affects them, which has a positive effect on the functioning of all body systems. The algorithm for using the massager is as follows:
- Place the mat on the floor. The surface must be flat and hard (carpet is not suitable).
- Stand on the massager with your bare feet and do the necessary exercises.
- The duration of the lesson is determined individually. The guideline will be dull pain, which indicates the need to complete the procedure.
Often such a mat is prescribed to children to prevent the development of flat feet or to treat it. A small child does not understand why he needs to walk on “thorns” with his bare feet. In such cases, you should choose the option of a product with pebbles and convince the child that he is walking along the seashore. To keep your baby from getting bored, you can use the following exercises that are also suitable for adults:
- "Teddy Bear." Turn your legs so that you stand on the outer arch of your feet, hands on your waist and stomp on the mat for 30-60 seconds.
- "Thumbs up." Place your hands on your belt and stand straight. Lift your toes up and hold for about 15 seconds, return to the starting position. Repeat about 15 times.
- "Goose". Squat down and walk like a goose for 40 seconds.
- "On the socks". Stand on your toes and walk for 30 seconds.
- "On one leg." Stand straight, alternately lift one and then the other leg. The toe should point down and be pulled tight. Repeat 12 times.
Attention! The information presented in the article is for informational purposes only. The materials in the article do not encourage self-treatment. Only a qualified doctor can make a diagnosis and give treatment recommendations based on the individual characteristics of a particular patient.
Found an error in the text? Select it, press Ctrl + Enter and we will fix everything!I share my experience of making a massage mat with my own hands.
Massage mat made from cereals and old clothes
In the process of preparing for little Yana’s first steps, I came across information about a large number of different deviations in the formation of feet. Moreover, according to some experts, these deviations are physiological and go away without any intervention. According to other experts, the sooner you start treating abnormalities, the greater the chance of cure. The most important thing is that both are unanimous in their opinion - the more natural (or similar in structure) walking surfaces a child has, the lower the likelihood of deviations occurring! Ideal in this regard is walking barefoot on sand, grass, and pebbles, but all this is difficult to provide regularly for city children. It is in order to fill the gap in textures for small developing legs that mothers weave hard-weave mats and make all kinds of massage mats. I decided to keep up with the progressive mothers, so I came up with and made a massage mat with my own hands.
DIY massage mat made from grains | What you need
- 2 old dad's shirts;
- 1 old dad jeans;
- 3 napkins with wooden elements for hot dishes (two napkins were used for outside decoration, one bamboo napkin was inserted into one of the squares);
- fillings: beans, buckwheat, lentils, rice;
- padding polyester (I decided to use it to make the rug denser. In fact, it was not needed in the denim squares);
- 50 cm of satin (I wanted to use it to introduce Yana to the unusual smooth and pleasant texture). I chose a very thick satin that does not have puffs;
- 80 buttons for decorating one square;
- grandma's sewing machine.
DIY massage mat | Sequence of work
1.I cut old shirts, jeans and satin into squares.
 The hot napkins immediately attracted attention. After Yana’s sensory attacks, some fragments began to fall off and had to be strengthened with fishing line. |
 All materials, including old clothes, turned out to be my favorite shades - spring thawed patches and slush. All materials, including old clothes, turned out to be my favorite shades - spring thawed patches and slush. |
2. All further work consisted of sewing bags from squares, inside with padding polyester. I used padding polyester to make the rug denser; if you initially take coarser materials, you can do it without padding polyester.
3. I pre-stitched the bags in which the filler was supposed to be filled with longitudinal stitches so that the filler would not bunch up.
4. The stitched bags had a lot of small pockets, which I filled with cereals and sewed up. The bags, for which decor was supposed to be on top, were simply sewn up with padding polyester inside.
5. Finally, two bags were decorated with napkins for hot food, one with buttons.
 |
 |
DIY massage mat | Mistakes in my design and tips for improvement
Before starting sewing, I thought for a long time about the design of a rug that would be easy to clean, but nothing came to mind and I just started sewing as best I could. I sewed and sewed the bags to each other sequentially, which I regretted at the end of the work. If anyone decides to repeat my experience, I recommend sewing your own bags with fillings and decor. And each bag should be equipped with Velcro or buttons for adhesion to its neighbor. With this arrangement, it will be very convenient to clean your rug in separate blocks, but mine is quite difficult to clean. I wash it only when necessary and only by hand.
DIY massage mat | We organize events to prevent flat feet
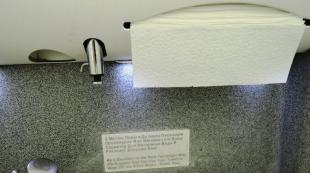
After the fuse of enthusiasm is over, such rugs are often abandoned over time. Not every mother has the patience to devote time to exercise on a regular schedule. I have a life hack for this case - I placed the rug in the most accessible place in the corridor. With this placement of the mat, the feet of all family members receive a daily dose of prevention against flat feet and a pleasant sensation from relaxing the muscles of the feet. By the way, another name for such rugs is “orthopedic.” In addition to the handmade option, you can consider industrial ones. Now there is a wide variety of them. 
Orthopedic mats in My-shop are presented with imitation of various textures: stones, sea coast, forest, and there is even an option for the first steps.
DIY massage mat | Mom's assistant 😉
I admit, Yana threatened to disrupt the entire event several times - she made repeated attempts to sew on her own and every time she was very upset when she was not given a needle. But at the moment of filling the bags, Yana was engaged in real cereal chaos - pouring and scattering them over various containers and surfaces. At the same time, the entire kitchen area turned into a large sensory box 😀.
|
Developing fine motor skills |
Mom's assistant |


DIY massage mat | Completion
 The result exceeded my expectations - the rug turned out to be not only functional, but also a nice addition to the interior!
UPD: I share my operating experience. Our rug is now over a year old. Most of the time it lay in the corridor and did not lose its appearance and relevance.
UPD after 3 years:In the third year of use of the mat, the hot trays made of wooden elements could not stand it and began to crumble. I had to reinforce them over the entire area with fishing line.
If you liked the blog content, subscribe or join the group