Production of plywood board. Making a furniture board at home with your own hands, the subtleties of the process How to make a wooden board with your own hands drawings
Hello. Today we will talk about how you can make a shield with your own hands for, or simply for the purpose of reconstructing ancient weapons and armor. Previously, we have already considered the material about and, as well as weaved. Now the turn has come for the front line of defense of the medieval warrior - the shield. The shield must be not only durable and impact resistant, but also lightweight. Therefore, think about what kind of tree, and we will make a shield from it, you will use it. The best option for making a shield would be birch. This type of wood has not only good viscosity and elasticity, but also lightness, in relation to other alternative species. The next step is to determine the size of the shield. A shield with a diameter of 600-700 mm is considered optimal. Such a shield will fully protect the forearm (from the elbow to the hand) and at the same time will not be too heavy.
Manufacturing technology of a medieval shield
Boards for the shield must be well dried, have a straight-layer structure and not have large knots. So, the shield manufacturing technology is as follows. Take a birch board measuring 2100x200x40, already pre-planed, and saw it into four parts. You should end up with two 620mm pieces and two pieces of what's left. Carefully cut and tightly fit the side edges of these boards to each other. From these pieces we will glue the base of the shield. Use plasticized PVA glue. Leave to dry overnight.
Now we need to plan the planes of the shield blank in order to smooth out the joints of the boards by removing the steps. Next, we draw a circle with a radius of 300 mm and cut it out with a jigsaw.
Next, we need to make our shield blank convex. To do this, on the one hand, we plan with a planer, deepening from the edge to the middle, and on the other hand, on the contrary, from the middle to the edge. As a result, we should get a kind of wooden lens with a thickness of 15-17 mm.
Well, here we have the wooden base of a homemade medieval shield ready. Now let's get to the metal.
In the center of the shield there should be a convex bowl called an umbon. The umbon can be knocked out of a round metal plate 1.5-2.5 mm thick by placing it on a lead pad and tapping it from the center in a divergent spiral until a convex dome 150-200 mm in diameter and 50 mm deep is obtained. Bend the edges on an anvil 15-20 mm wide. This is how cold forging works. But, in order to precipitate a cup to such a depth, it is also necessary to use hot forging, heating the metal with a gas burner or until red, upsetting the metal in an annular mandrel or matrix. However, if blacksmithing is new to someone, he can order an umbon in a blacksmith, or buy something similar in a store.
Now we need to iron the edge of our medieval shield. To do this, we again need an anvil and a hammer to bend a steel strip two millimeters thick along a radius of three hundred millimeters in a plane. We put the strip on the anvil and begin to flatten one of its edges with a heavy hammer, periodically checking its curvature with a cardboard template. If your strip is made of ductile metal, then cold forging will be enough for you. But still, it is better to do it by heating the strip with a gas burner to redness and letting it cool slowly. After that, we continue to beat on it with a hammer. It is not necessary to bend the strip around the entire circumference of the shield. It can be divided into several separate parts. That will be a little easier. Although the work is quite hard. We adjust the metal to the shield so that there is an edge for bending to the thickness of the shield. A ninety-degree edge bend can be done on an anvil. To do this, we change one of the “lips” of the vise to a plate, the upper edge of which is curved along a radius of 300 mm, that is, along the circumference of our shield.
We carefully adjust the finished edging of the shield ribs, with each other and attach to the shield with bolts, which we will later replace with rivets. We also fasten the umbon to the middle. Now we need to work on the rest of the shield details. We need to cut out twelve overlays for the shield from sheet iron using a jigsaw. The photo clearly shows what shape they should be. But you can show your imagination and make something of your own. The plates can be riveted to the shield with furniture bolts. We rivet from the inside of the shield, putting wide washers on the bolt rod. We saw off the rod so that it is exposed above the surface of the shield by two, three millimeters.
Now it remains for us to make the elements of holding the shield. To do this, we need to carve a wooden one (you can use a copper or brass tube) and rivet it from the inside of the shield. The belt loop for the forearm is made of leather 70 mm wide in the center and 40 mm at the edges. We attach it to the shield also with the help of through rivets. But the pillow for the forearm can be screwed to the shield with rounded bolts.
Well, that's probably all. Our medieval shield is completely ready. You can role-play or hang it on the wall as a decoration next to your other remodeled pieces. Good luck!
The article is a rewrite. Photos taken from the book "Reconstruction of ancient weapons"
When encountering enemies in the game, you probably thought about such methods of protection that would allow you to minimize the damage inflicted on the player. And then you will learn how to make a shield in Minecraft and color it. The fact is that this option is really very useful, but not used by all players. Just for the purpose of increased protection of the character, the developers provided for the possibility of creating a shield.
What is a shield?
The item has a certain durability, which is spent on repelling enemy attacks and can be restored by repainting or repairing.
Shields are most effective in close combat, and their use significantly affects the character's movement speed, greatly slowing him down.
How to create a shield in Minecraft?
According to the rules of the game, to make an item with more than four ingredients involved, you must use a workbench. It allows you to increase the number of crafting slots up to nine, which provides a significant expansion of the range of products obtained.
To create a shield, you need one ingot of iron and six units of planks.

The latter, by the way, are divided into several separate types: oak light and dark, birch, tropical, acacia and, finally, spruce. Each of them has its own shade and name, formed, as you might guess, from the name of the "parent" tree. Due to the fact that they all have the same properties, it is allowed to use any of their varieties.
How to color a shield in Minecraft?
Since the shield is not only a means of protection, but also an original accessory, it can be painted. Unlike the crafting of the item itself, the application of the pattern is carried out both on the workbench and from the inventory. This is done by placing a flag in one cell, and in another, in fact, a shield.

As for the flag, it is completely consumed during the transfer of the image, or, in other words, disappears. Its secondary production requires a workbench, one stick, and six multi-colored wool. The resulting pattern will depend on the selected shade of the latter and their layout.
It should also be noted that the surface of the shield must be clean in order to apply the pattern. In other words, repainting the item is not allowed.

Conclusion
If you found this information useful, be sure to share it with your friends. You can also rate the article and leave a comment. We also advise you to read other useful news from our resource, there is a lot of useful and interesting information that you may not know. Thank you for your attention!
Video
We are waiting for your comments, feel free to write!
Novice furniture makers sometimes face a problem - where to buy a furniture board. Factory samples are not always suitable for the intended design, but blanks can be made independently.
For the manufacture of shields, you will need special equipment: a planer, grinders (belt and surface grinders). Boards for work choose the same breed, without knots, dried, with minimal warpage. The best option is to buy a log and saw it into pieces of the required size. The cutting angle is 90 degrees. Pine, oak, birch are suitable for the manufacture of shields.


Wooden panels are very practical - they do not deform, have slight shrinkage, the structure of the tree is not damaged, so the investment in the production of lumber quickly pays off.
Lyubov Fedotova
Hello, dear guests of my page!
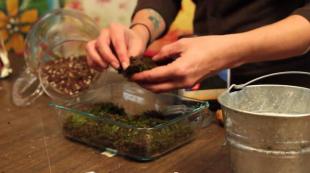
For work need:
Corrugated packaging cardboard (medium-sized boxes, so that you can cut out the base of the shield);
A picture of the shield itself in A4 format (Internet);
Glue stick;
Colored foil of any color (we have light gray and light green);
Getting Started work:
1. I prepared pictures of shields from the Internet and the boys chose what they liked. Previously, she had a conversation on heraldry - she told and showed the children what this or that animal, symbols, signs means on emblems and shields.
2. The guys cut out the pictures with the image of the shield.

3. The boys circled them on cardboard and added about 5 cm on each side (I corrected the increase for some guys myself). I cut out the shields - the basics myself, since it is difficult for children to cut out corrugated packaging cardboard.

4. The guys glued the picture to the base of the shield.


Here's what we got.

5. Decorated with circles of colored foil (decorated in a group, as it started to rain outside)

6. A handle was made from adhesive tape on the back. These are the shields in the game, but the handle is visible.

The children really liked the shields and games with them. Who viewed my post Knight Tournament", I saw the shields in action, and whoever doesn't, come visit.
Thank you for your attention.
The question of how to make a shield in Minecraft sooner or later begins to interest all users in the game. This defensive item helps you avoid damage from enemies. It is easy to use and its recipe will not be difficult for most players. It is enough to know about the ingredients to combine them.
Application and general characteristics
Players are interested in the question of how to make a shield in Minecraft, due to the high protection parameters of this rectangular object. It blocks all incoming damage, including arrows. Its durability has 337 points, which allows you to block enemy attacks for a long time.
This thing is better to equip the character in the left hand, since there should be a weapon in the right hand. Thus, the user will be able to keep the defense and deal damage to the enemy at the same time.
Preparing Resources
The answer to the question of how to make a shield in Minecraft is quite simple. First, the user will have to make six blocks of boards of any tree. To do this, it is enough to saw a block of wood, from which four elements necessary for the player are obtained. Do the operation twice in order to have all six pieces. After that, you need to create. There are three ways to do this - burn coal, connect nine pieces of iron, or saw a block of this material into nine parts you need. The user chooses the method of obtaining these resources on his own, based on his capabilities. The easiest way is to find an iron block and get nine ingots, which will come in handy more than once in the future. After collecting resources, it will become clear how to make a shield in Minecraft.
Crafting and decorating an item
After extracting resources, the user only needs to open the crafting window and move the necessary materials into it. There will be boards in the upper windows, and an iron ingot between them. The remaining cells are needed for four blocks of wood products. After placing the materials, the desired shield will appear in the outgoing window. It will have a standard shape, but it can be decorated with flags that are made from colored wool.

For one such item, you will need six blocks of sheep material and one stick. Then it remains only to connect the shield and the flag. They can be either of the same type or have patterns on the outside. This crafting method describes how to make a shield in Minecraft without mods. Third-party programs allow you to receive items from content that is not intended by the game developers.